WordPress is one of the most popular and widely used Content Management Systems (CMS) worldwide. Its ease of use reaches a broad audience, including individuals, organizations, and companies, enabling them to build websites quickly and efficiently. With a user-friendly interface, a rich ecosystem of plugins and themes, and an active global community, WordPress has become one of the most popular CMS platforms, powering websites ranging from personal blogs to large corporate sites. However, to run WordPress optimally on a Linux server environment, we need an integrated software stack that works well together. The role of the LAMP Stack is crucial here in ensuring WordPress runs smoothly on Linux-based servers.
LAMP consists of four main components: Linux, Apache, MariaDB (or MySQL), and PHP. This open-source software bundle is widely used as the foundation for developing and serving dynamic websites. In this guide, Debian is chosen as the Linux operating system because of its stability and broad community support. Apache functions as the web server that receives and processes requests from users’ browsers. MariaDB manages the database containing all WordPress content and configuration, while PHP executes server-side scripts connecting all components seamlessly. With this combination, your WordPress site can run independently, efficiently, and be customized as needed.
This guide is designed to walk you through the entire process of installing WordPress on Debian using the LAMP Stack, step by step. It is suitable for beginners who want to understand the process from start to finish, as well as intermediate users seeking to deepen their technical knowledge. Throughout this process, you will learn how to:
- Install and configure the Apache web server
- Install MariaDB and secure its installation
- Install PHP and the additional modules required by WordPress
- Create a dedicated database and user for WordPress installation
- Download and set up WordPress files in the server directory
- Configure Apache to serve the WordPress site optimally
- Determine the IP address and access WordPress via a browser
Additionally, we will cover some fundamental server management principles, such as file permission settings, web directory structure, and best practices for maintaining server security and efficiency. By the end of this guide, you will not only have a working WordPress site but also understand how the entire system works behind the scenes. This knowledge is essential if you plan to customize, troubleshoot errors, or expand your digital infrastructure independently in the future.
Preparing the Debian System
First, ensure your Debian system is up to date and stable:
sudo apt update && sudo apt upgrade -yInstalling Apache, MariaDB, and PHP
Start by installing the main web server and database components:
sudo apt install apache2 mariadb-client mariadb-server curl wgetNext, install PHP along with various supporting modules:
sudo apt install php php-bcmath php-curl php-fpm php-gd php-intl php-imagick php-mysql php-mbstring php-soap php-xml php-xmlrpc php-zipSecuring MariaDB
MariaDB needs to be configured for enhanced security. Run the following command to start the configuration process:
sudo mariadb-secure-installation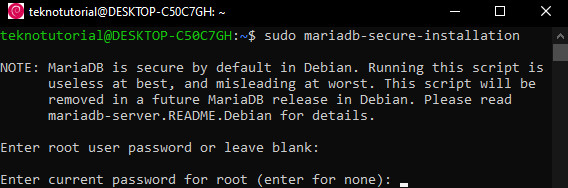
Set the MariaDB root password.
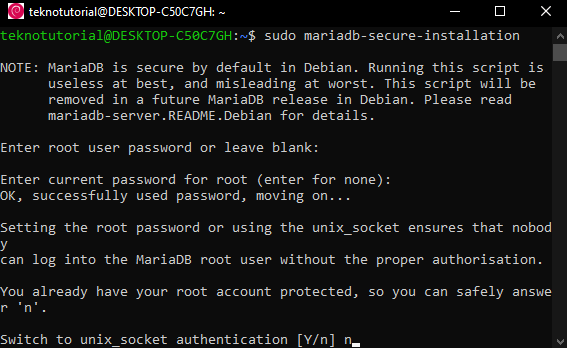
Type n if you prefer to log in as MariaDB root using a password instead of the system user.
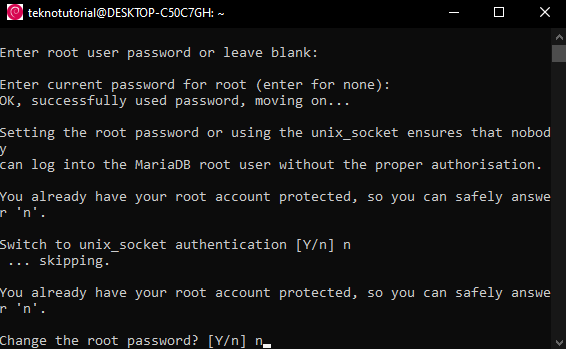
Type n if you don’t want to change the current root password.
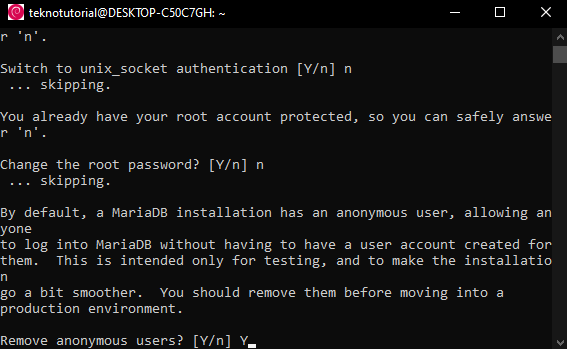
Type Y to remove anonymous users for better security.
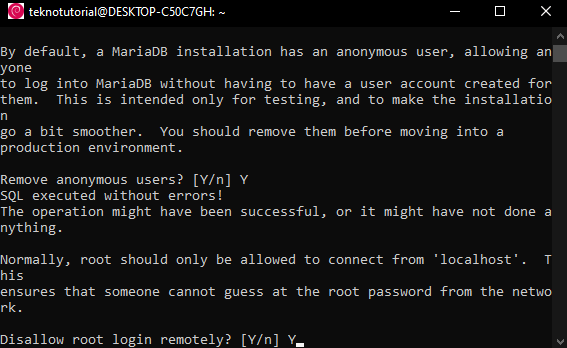
Type Y to prevent root login from remote machines.
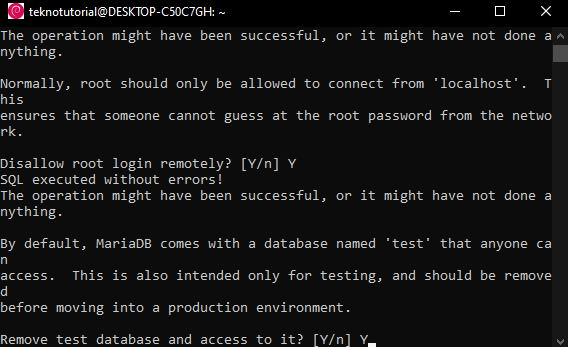
Type Y to remove the test database.
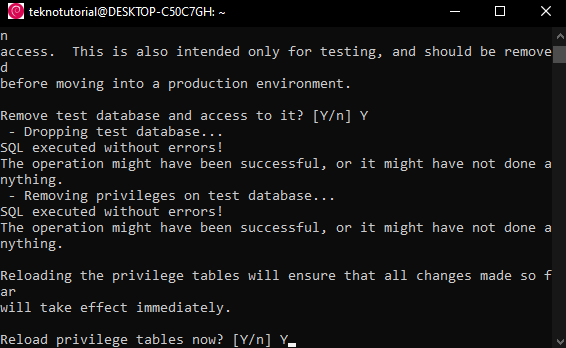
Type Y to reload privilege tables.
Creating a Database and User for WordPress
Create a dedicated database and user for your WordPress installation to store and access data properly:
sudo mysql -uroot -pInside the MariaDB prompt, run:
CREATE DATABASE teknotutorial;
GRANT ALL PRIVILEGES ON teknotutorial.* TO 'teknotutorial'@'localhost' IDENTIFIED BY 'passwordAnda';
FLUSH PRIVILEGES;
EXIT;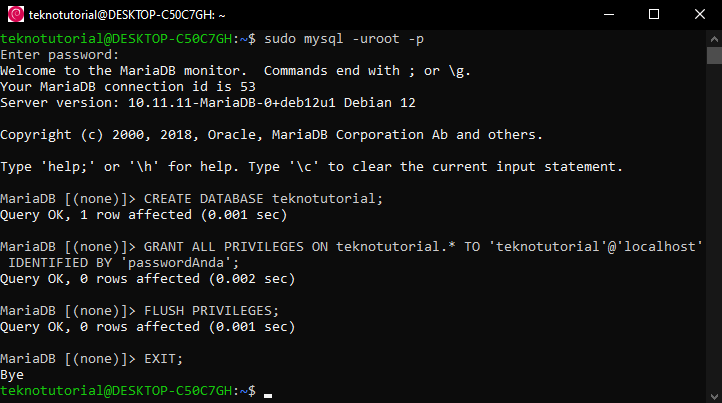
Replace yourPassword with a strong, unique password for database security. You can also change teknotutorial in the database and user names to suit your preferences.
Downloading and Setting Up WordPress
Now download the WordPress installation files and place them in the appropriate directory:
cd /var/www/html
sudo wget https://wordpress.org/latest.tar.gz
sudo tar -xzvf latest.tar.gz
sudo rm -rf index.html latest.tar.gz
cd
sudo chown -R www-data:www-data /var/www/html
sudo chmod 755 /var/www/html
These commands download the latest WordPress version, extract it, remove default files like index.html and the installation archive, and set the correct permissions.
Configuring Apache for WordPress
You need to adjust the default Apache configuration so that the WordPress directory is the primary directory served by the server.
Edit the default Apache config file:
sudo nano /etc/apache2/sites-available/000-default.confChange the DocumentRoot to point to WordPress and add directory settings:
DocumentRoot /var/www/html/wordpress
<Directory /var/www/html/wordpress>
    AllowOverride All
    Require all granted
</Directory>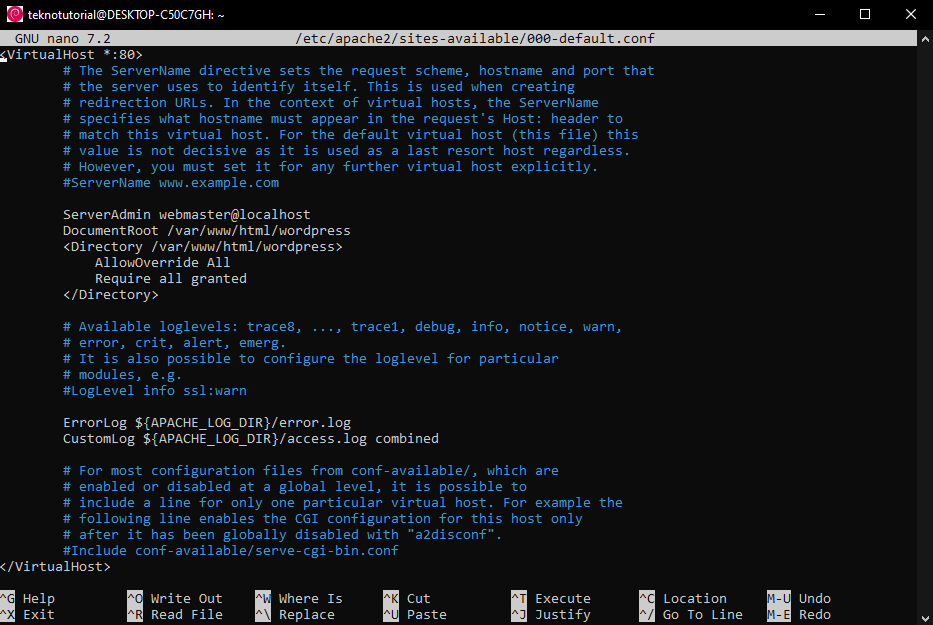
Enable the rewrite module and restart Apache to apply changes:
sudo a2enmod rewrite
sudo systemctl restart apache2
Accessing WordPress via Browser
Next, find your IP address:
ip a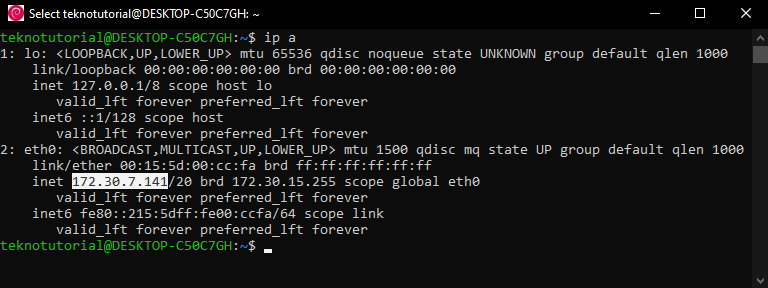
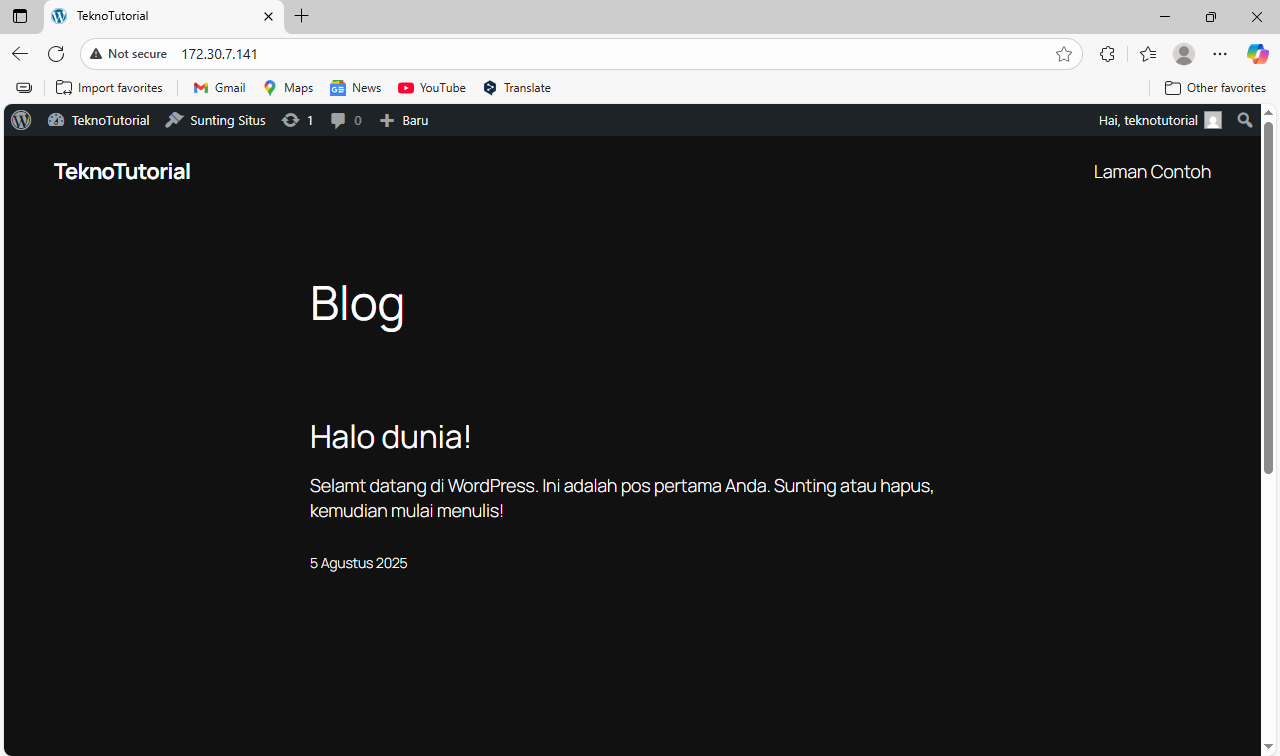
Open your browser and visit the IP address (e.g., http://172.30.7.141). On the initial screen, you will be prompted to select a language.
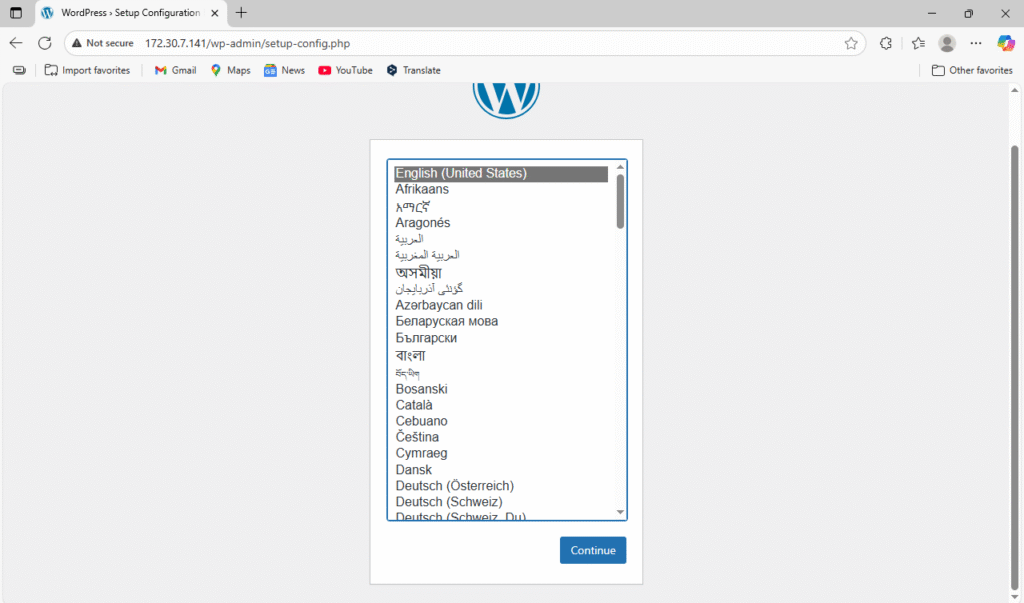
Choose your preferred language and click Continue.
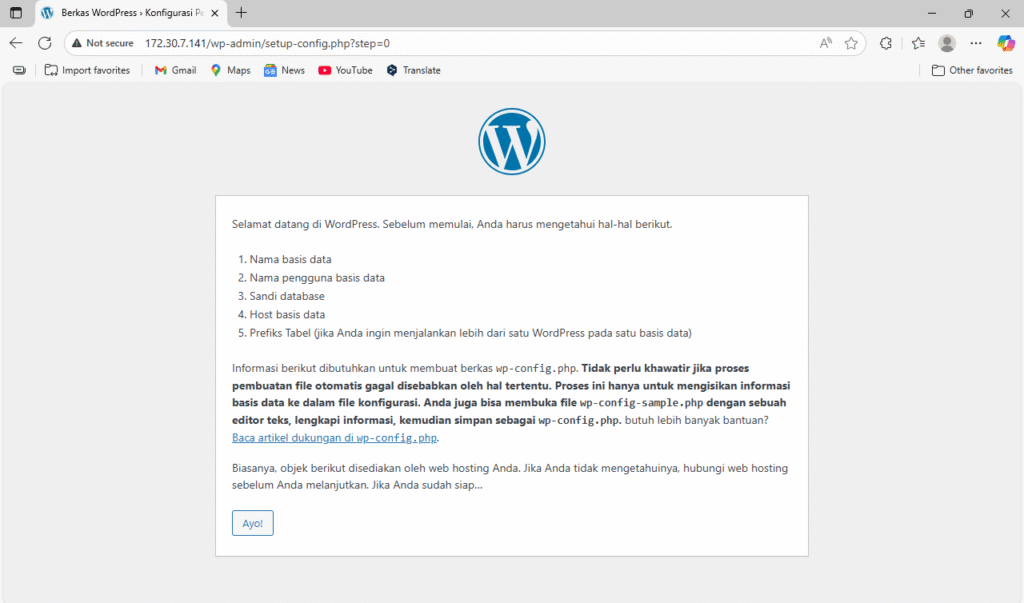
Click Let’s go! to begin setup.
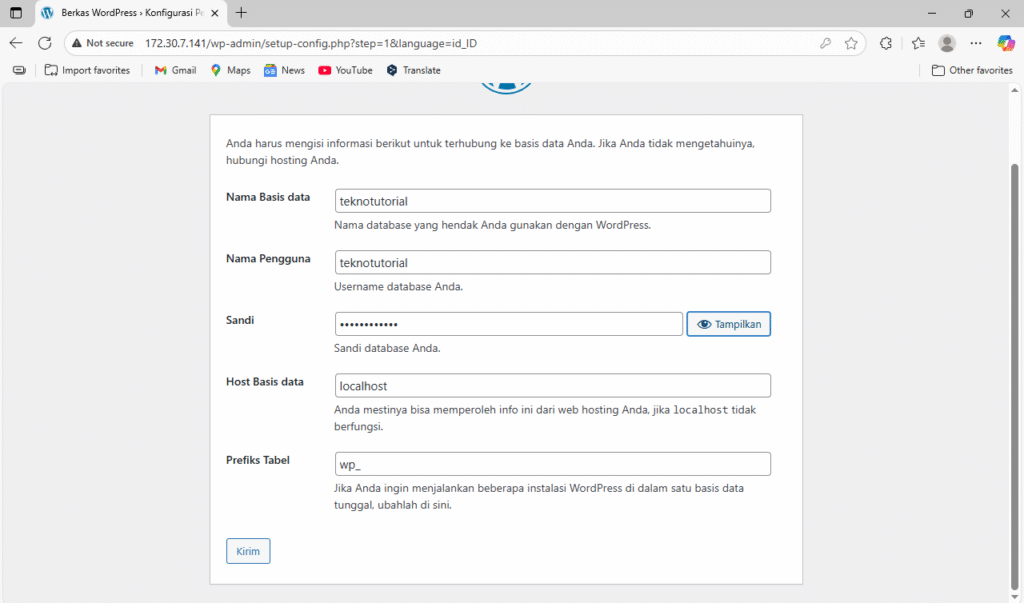
Enter the database details you created earlier and click Submit.
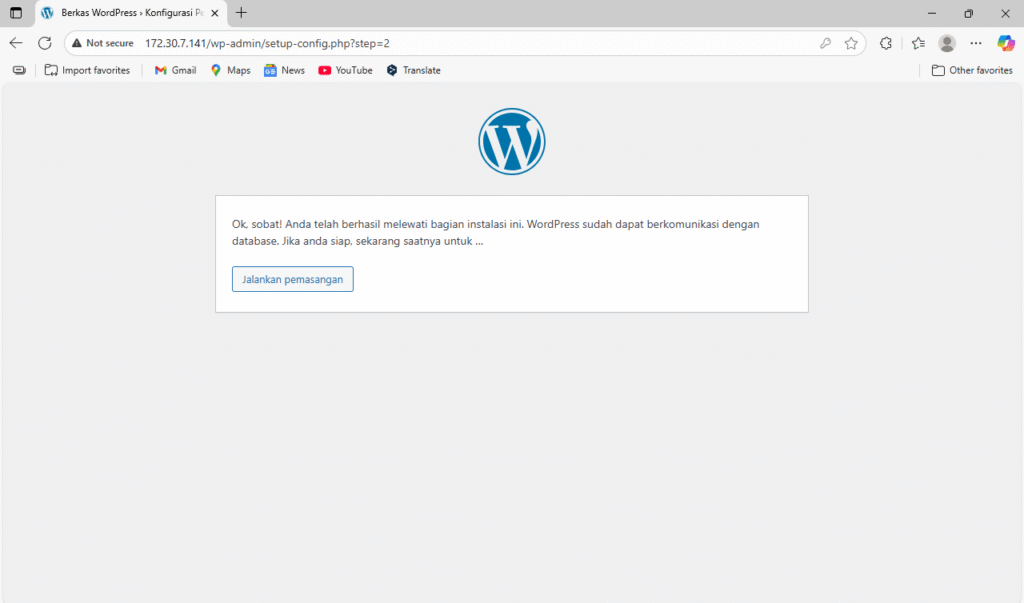
Click Run the installation to proceed.
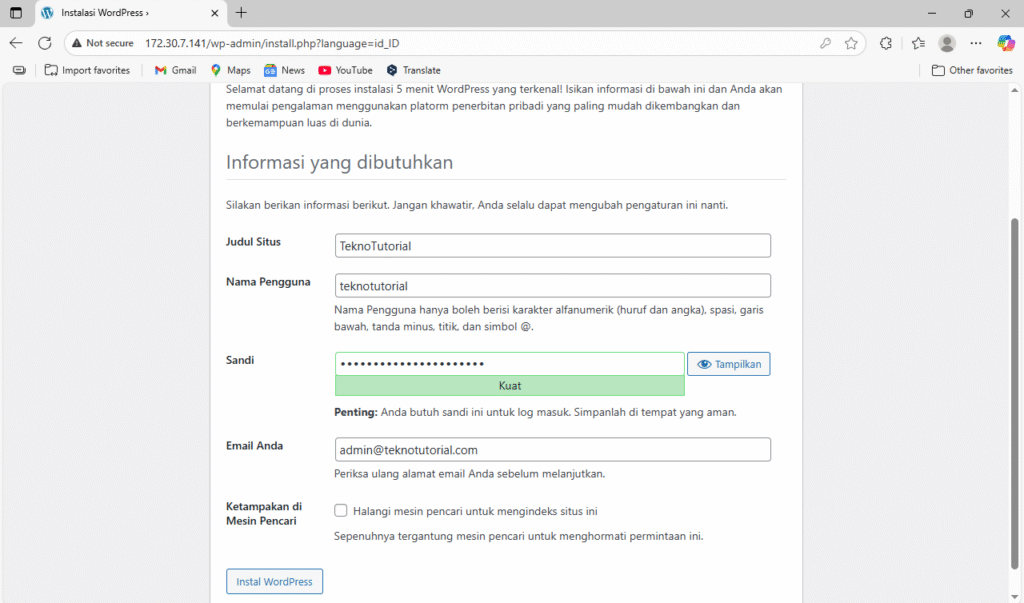
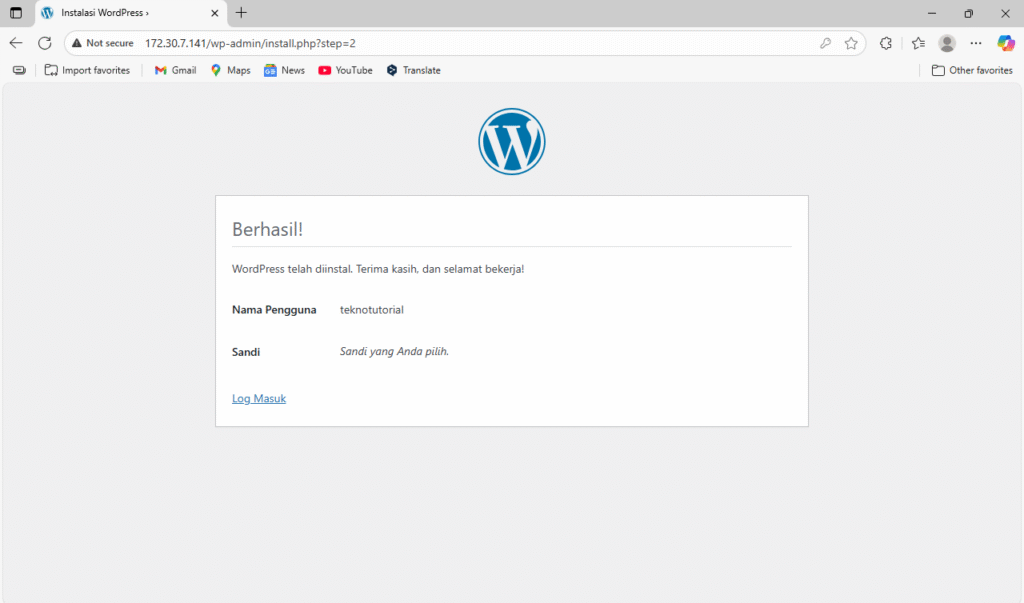
Fill in your site information and click Install WordPress.
Click Log In to access the WordPress admin login page.
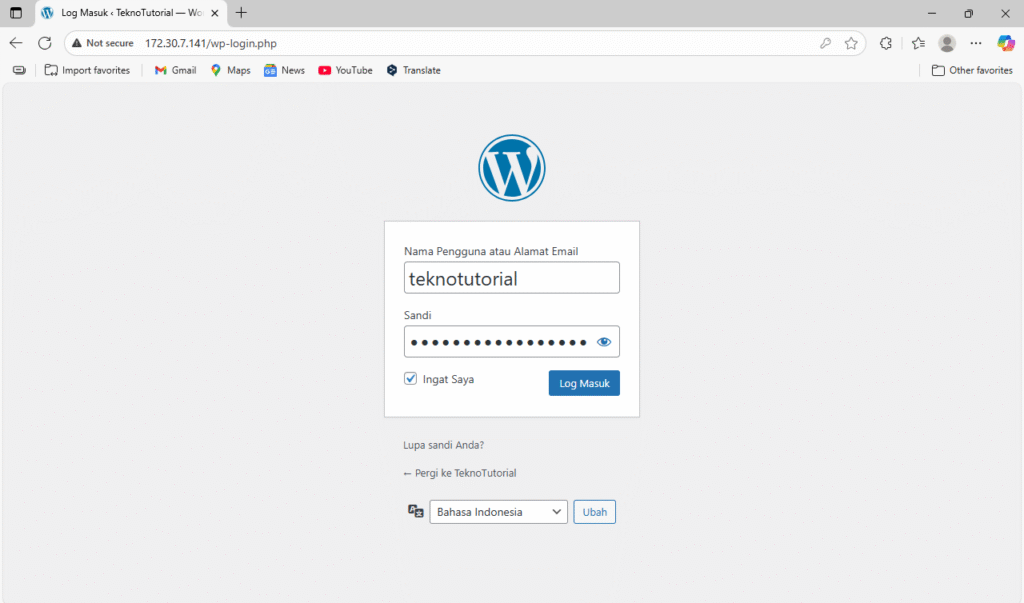
Enter the username and password you created.
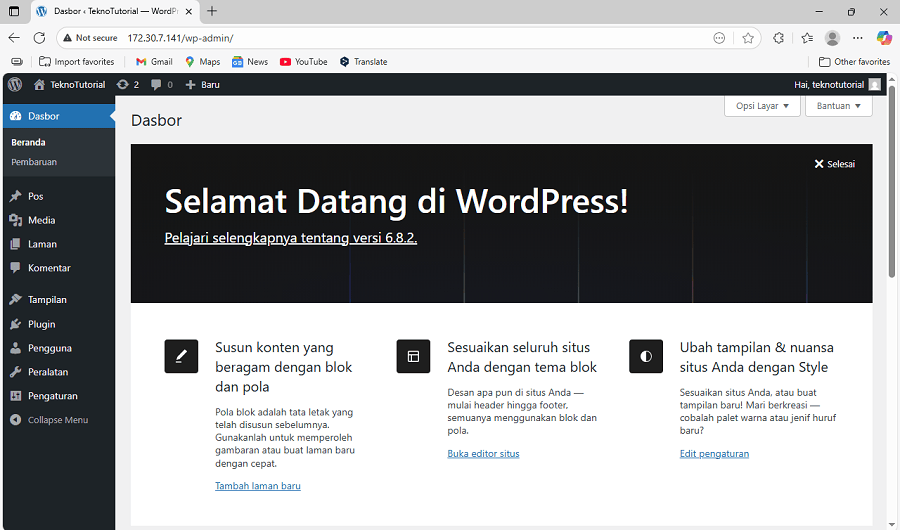
After Log In, You Can Start Managing Content, Adding Plugins, Changing Themes, and Setting Up Your Site Configuration.
Conclusion
By completing this guide, you have successfully installed and configured WordPress on a Debian system using the LAMP Stack. This process includes installing the Apache web server, MariaDB database system, and PHP programming language, all working together to support WordPress execution. Beyond installation, you have learned about securing your database, managing web directories and file permissions, and adjusting Apache’s configuration for WordPress needs. These steps are foundational for managing a web server independently and professionally. With this understanding, you will feel more confident maintaining and developing WordPress-based websites in the future.
However, basic installation is not the end. To maximize your WordPress site’s performance and security, it is highly recommended to perform advanced optimizations. These include installing free SSL certificates from Let’s Encrypt to secure HTTPS connections, enabling firewalls like UFW to restrict unauthorized traffic, and setting up automatic backups for your database and site files to recover data in emergencies. Additionally, integrating caching and Content Delivery Networks (CDNs) can speed up site access, and monitoring server resources ensures long-term stability. With a solid technical foundation combined with ongoing maintenance, your WordPress site will be ready to meet various challenges and continue growing alongside user needs and technological advances.


