Creating an email address with your own domain is an important step to enhance the professionalism of a website or online business. By having an email address that matches your domain name, you not only appear more trustworthy but also make it easier for visitors to remember you. A custom domain email gives the impression that communication comes from an official source rather than a general personal email account. Moreover, using a domain-based email helps strengthen brand identity since every message you send reflects your domain name. This is especially beneficial for small business owners, bloggers, and website administrators who want to establish a professional image without paying for premium email services. Thanks to services like Cloudflare and Gmail, creating and managing domain emails can now be done easily, quickly, and for free.
Through this guide, you’ll learn how to create a custom domain email without manually configuring a mail server or paying for extra services. Cloudflare provides a feature called Email Routing, which allows you to receive emails sent to your custom domain address and automatically forward them to your main inbox, such as Gmail. Meanwhile, Gmail can be used to send and reply to messages using your domain email address via SMTP and Google App Passwords. The combination of these two services makes the process efficient and beginner-friendly. This article will guide you through setting up Email Routing in Cloudflare, creating a Google App Password, and adding your domain email to Gmail, so you can send and receive professional emails directly from Gmail’s familiar interface.
Setting Up Email Routing in Cloudflare
The first step in creating your own domain email is to set up the Email Routing feature in Cloudflare. This feature allows you to receive emails sent to your domain address and forward them to your main inbox, such as Gmail. The main advantage is that you don’t need to configure a mail server manually or use any external service. The process is simple: go to your Cloudflare dashboard, click on your domain, then navigate to Email → Email Routing to open the Email Routing page.
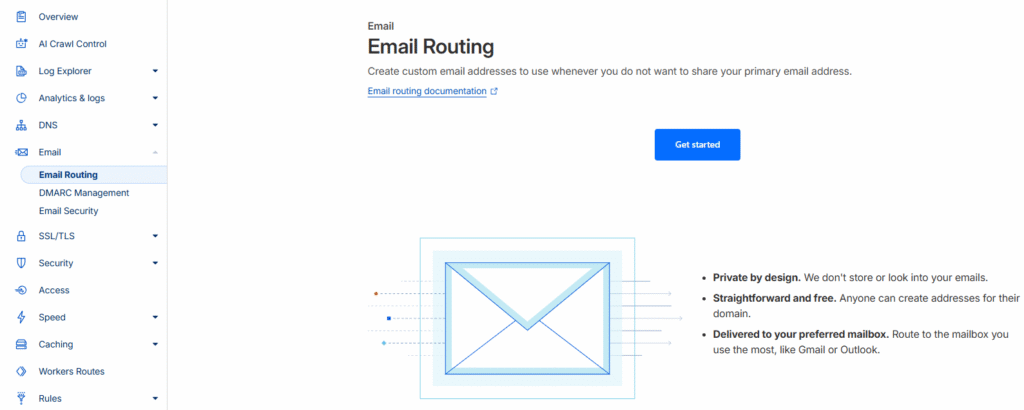
On the initial Email Routing page, Cloudflare provides a brief explanation of the service’s benefits. It explains that Email Routing lets you create a custom email address for your domain and forward incoming messages to an inbox like Gmail. Besides being free, this feature is designed with strong security and privacy in mind, as Cloudflare does not store email content. To get started, click Get Started to begin setting up your first domain email address.
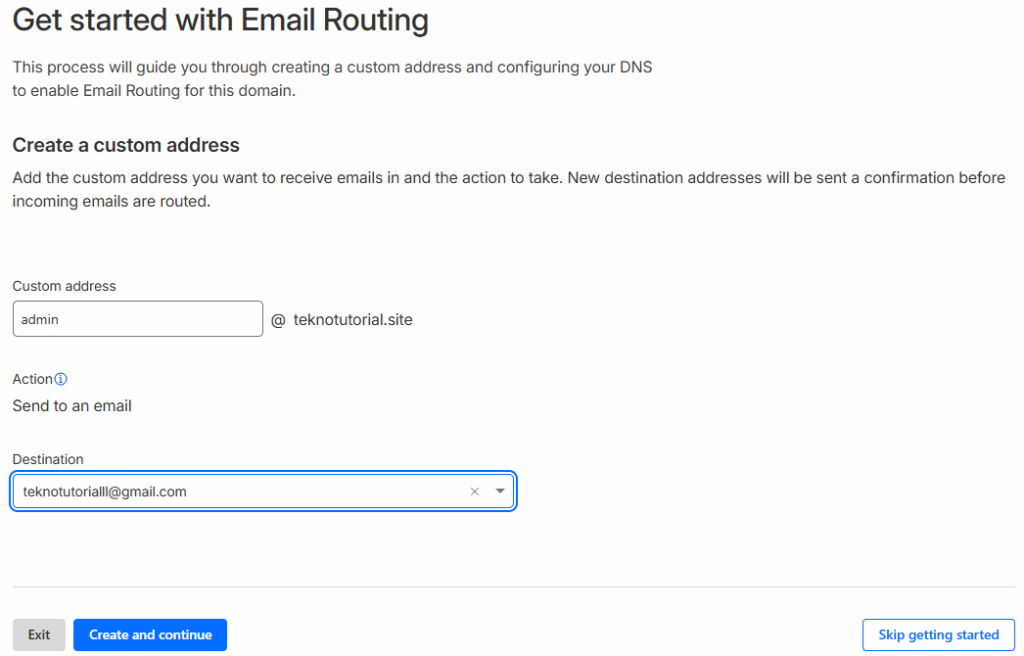
Next, you’ll create the custom email address you want to use. Cloudflare will ask you to enter a name for your domain email and specify the destination email address that will receive incoming messages. After that, click Create and Continue so the system can send a confirmation email to the destination address you entered earlier.
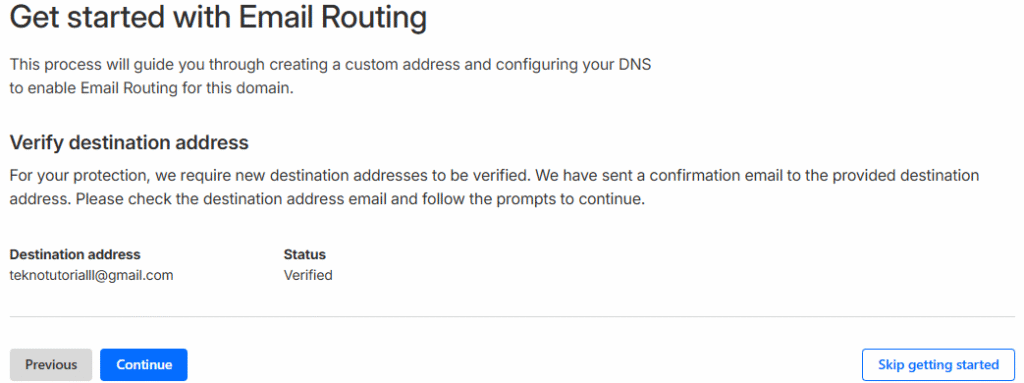
After adding the destination address, Cloudflare will ask for verification to ensure you own the address. Once the status changes to “Verified,” the destination address is ready to use, and you can proceed to configure your DNS settings so the email service can function properly.
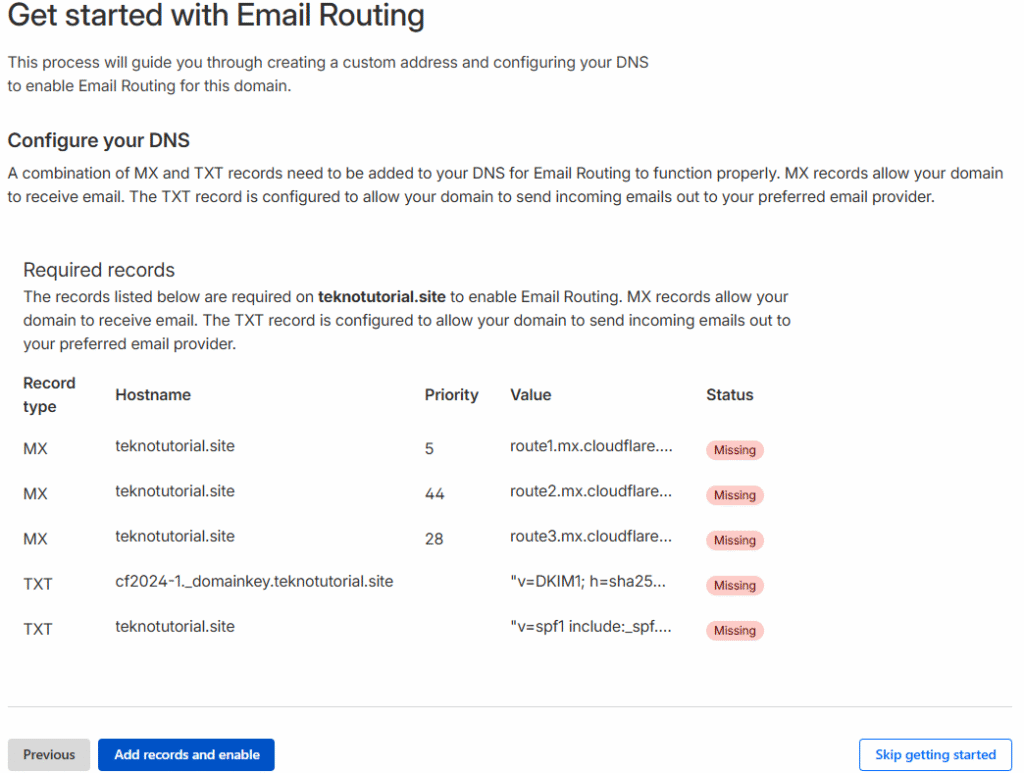
During DNS configuration, Cloudflare provides important notes about the records that need to be added automatically for Email Routing to work. You’ll see a list of MX and TXT records. MX records allow your domain to receive emails, while TXT records authenticate messages to prevent them from being marked as spam by other mail providers. Once all records are added and active, click Add records and enable to activate Email Routing.
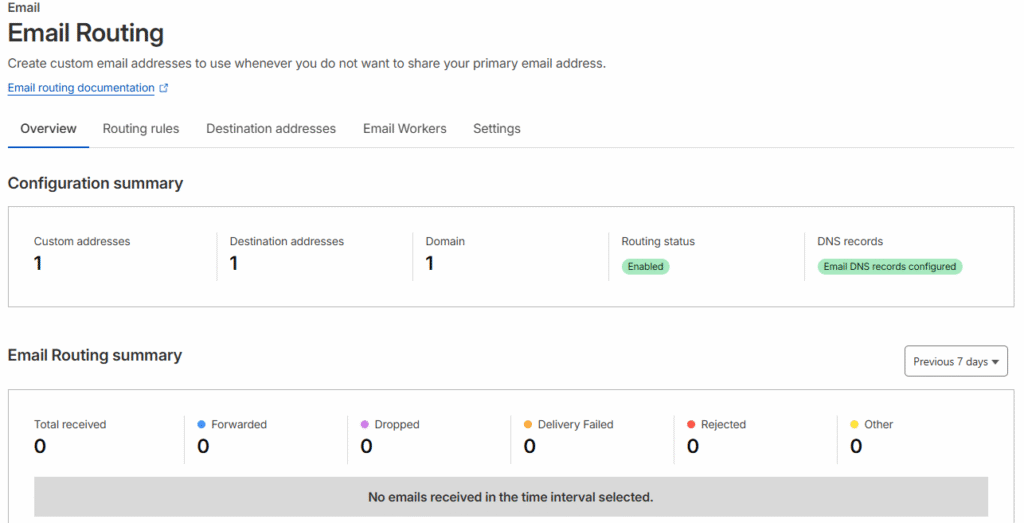
After completing the setup, the Email Routing page will display a summary of all configurations. It includes a list of custom email addresses, forwarding destinations, and domain status. At the bottom, you’ll also find an activity report showing the number of emails received and forwarded in recent days. If everything is set up correctly and there are no DNS errors, Email Routing is ready to use, and any messages sent to your custom domain email will now be automatically forwarded to your main inbox.
Creating a Google App Password
After setting up Email Routing in Cloudflare, the next step is to create an App Password in your Google account. App Passwords allow Gmail to securely connect to your custom domain email service through SMTP. This feature is useful because it lets you send messages using your custom domain address directly from Gmail without using your main Google account password. This keeps your account secure since the app password is used only for integration purposes. Visit https://myaccount.google.com/apppasswords to create an App Password in your Google account.
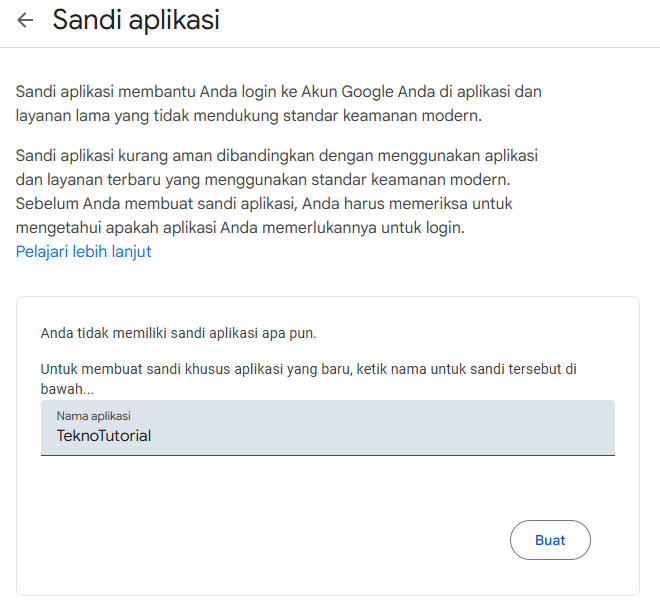
On the App Passwords page, Google explains its purpose: App Passwords help you sign in to older apps or services that don’t support modern security standards. Before creating one, ensure 2-Step Verification is enabled in your account. Then, in the available field, enter a name for the app that will use the password and click Create.
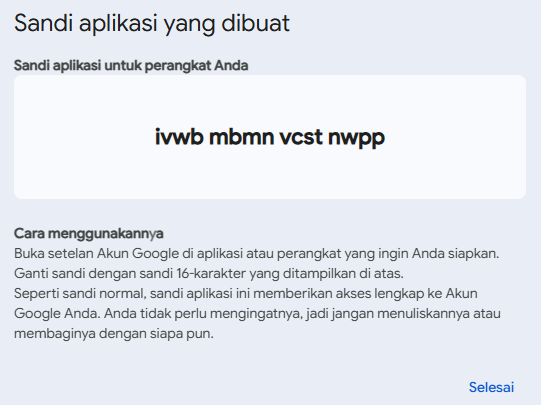
After the App Password is generated, a unique 16-character code will appear on the screen. This code serves as the dedicated password to link Gmail with your domain’s email server. Simply copy and temporarily save this code, as you’ll use it later in Gmail’s SMTP settings. Then click Done to close the page and continue to the next step.
Adding Your Domain Email to Gmail
Once Email Routing in Cloudflare and your Google App Password are ready, the next step is to add your custom domain email to Gmail so you can send and receive messages from one place. This eliminates the need to open multiple services to manage domain emails. The setup process is straightforward since Gmail includes a built-in option for adding other email addresses via SMTP configuration.
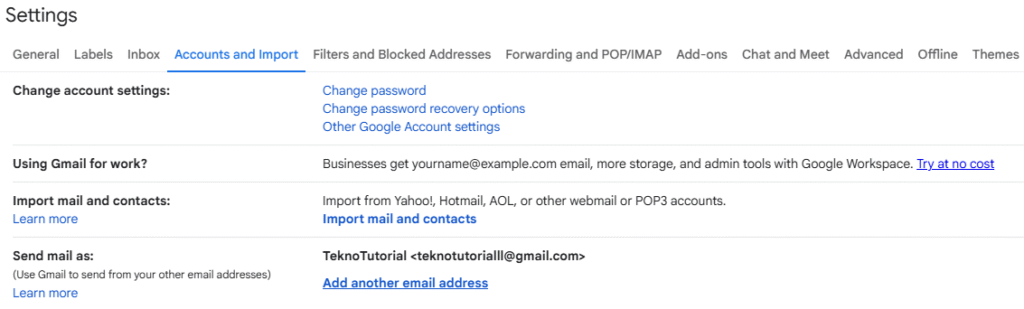
Go to https://mail.google.com/mail/u/0/#settings/accounts to add your domain email address. On this page, Gmail provides an option to add another email address for sending messages. This feature allows you to choose the sender address, either your main Gmail account or your domain email. To begin, click Add another email address.
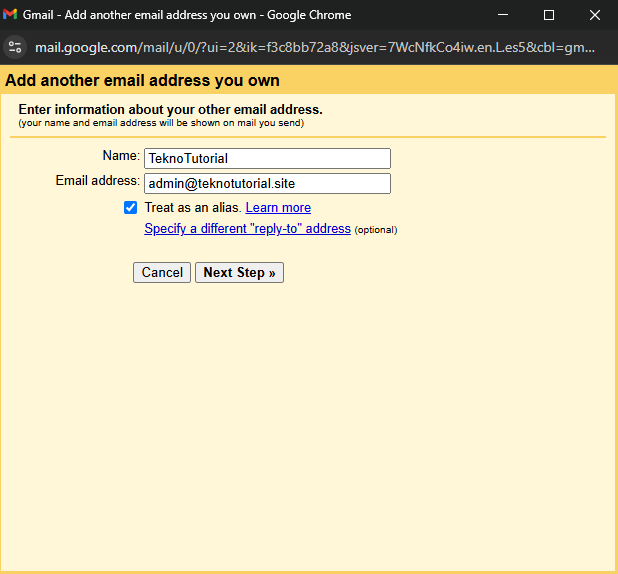
In the new window, you need to enter your name and the email address you want to use. The name you enter will appear as the sender when sending emails. Make sure the “Treat as an alias” option remains checked so replies are received in your main Gmail inbox. Once done, click Next Step to proceed to the SMTP configuration.
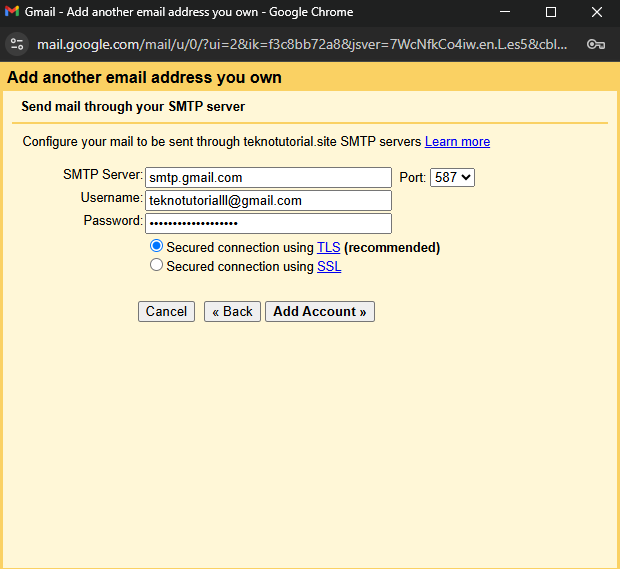
At this stage, Gmail will ask for SMTP configuration details to send emails using Gmail’s SMTP server with your custom domain address. You’ll need to enter the SMTP server address, port number, username (your main Gmail address), and the Google App Password you created earlier. Choose a secure connection using TLS to ensure encryption during transmission. After filling in all the details, click Add Account to continue to the verification process.
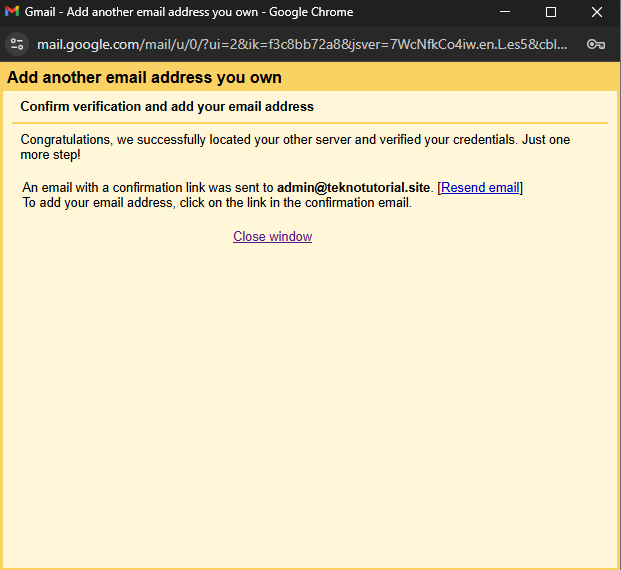
Once the SMTP configuration is successful, Gmail will send a confirmation message to the newly added domain email address. After verification, your domain email will be fully active in Gmail, allowing you to send and receive messages using your custom domain directly from your main Gmail inbox.
Conclusion
By following the steps above, you can now have a professional email address using your own domain, without paying for extra services or dealing with complex mail servers. The combination of Cloudflare and Gmail offers a practical and secure solution for managing both business and personal communications in one place. Through Cloudflare’s Email Routing, incoming messages are forwarded directly to Gmail, while Google’s App Passwords enable secure authentication for outgoing messages. As a result, you can enjoy the convenience of Gmail while maintaining a professional image with an email address that reflects your domain identity.


