Android offers a vast space for exploration for users who want to run Linux systems. With a bit of adjustment and the help of apps like Termux, Android devices can function as quite powerful portable Linux systems. Through a chroot approach, users can run a full Debian distribution directly inside Android without needing root access or complex system modifications.
This method allows you to access a Debian environment within an isolated directory, complete with an interactive shell, package management, and even a desktop interface like XFCE. As a result, your Android device can be used for various productive purposes, ranging from learning Linux, running scripts, to light development tasks.
This article will guide you step-by-step in installing Debian chroot on Android using Termux, along with configuring BusyBox, using the Termux Widget, and setting up a desktop environment. This guide is intended for users interested in exploring Linux systems on mobile devices, whether for learning, experimentation, or technical work outside traditional computers.
System Requirements
Before starting the installation, make sure you meet the following requirements:
- Android device with root access using Magisk and BusyBox Magisk module installed
- Stable internet connection
- At least 10 GB of free internal storage
- Latest versions of Termux, Termux X11, and Termux Widget apps
- Magisk Manager with BusyBox module enabled
Note: Ensure all apps used are the latest stable versions to avoid conflicts during installation. Download from official sources or trusted APK providers to guarantee compatibility with the latest Termux system.
Step 1: Install Termux and Supporting Components
The first step is to install Termux as the main terminal for running commands. Then, install Termux X11 for graphical interface support and Termux Widget so you can quickly run scripts via shortcuts on your home screen.
Make sure all apps are properly installed. Next, open Termux and run the following commands to grant storage access, update the system, and install necessary packages:
termux-setup-storage
pkg update && pkg upgrade -y
pkg install busybox git ncurses-utils pulseaudio root-repo tur-repo tsu termux-api vim virglrenderer-android wget x11-repo -y
pkg install termux-x11-nightly
Step 2: Create Debian chroot Directory
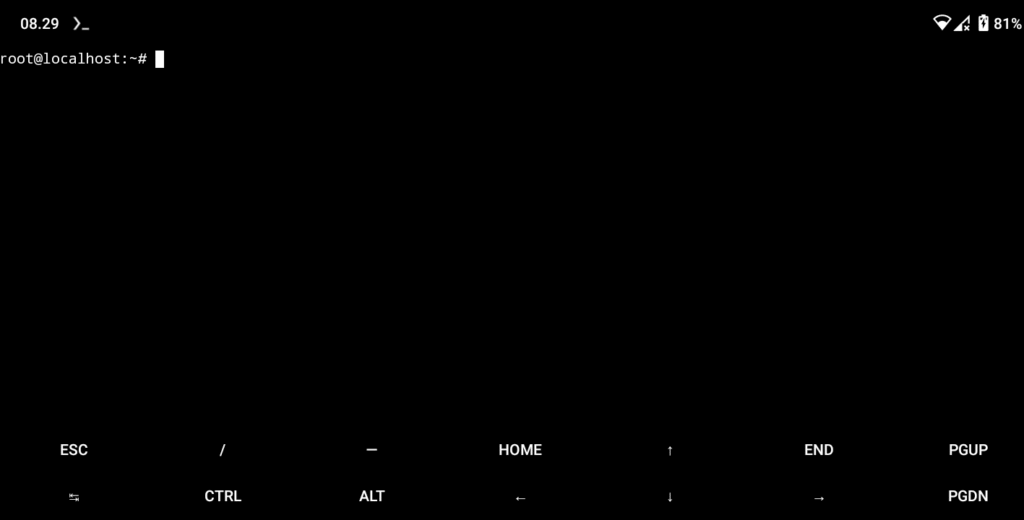
Enter the Android root shell by running:
suCreate a dedicated directory to serve as the Debian chroot environment:
mkdir /data/local/tmp/Debianchroot
cd /data/local/tmp/Debianchroot
Step 3: Download and Extract Debian RootFS
Use the link from the proot-distro project on GitHub to download the latest Debian rootfs. In this example, we use Debian Bookworm for the aarch64 architecture:
wget https://github.com/termux/proot-distro/releases/download/v4.17.3/debian-bookworm-aarch64-pd-v4.17.3.tar.xz
tar xpvf debian-bookworm-aarch64-pd-v4.17.3.tar.xz --numeric-owner
Move the extracted contents to the current directory and create additional directories:
mv debian-bookworm-aarch64/* .
mkdir sdcard
mkdir dev/shm
Remove the unneeded .tar.xz file:
rm -rf debian-bookworm-aarch64 debian-bookworm-aarch64-pd-v4.17.3.tar.xzStep 4: Prepare the Startup Script
This script is responsible for mounting various directories and entering the chroot environment.
Create the startup script:
cd /data/local/tmp
vi debian.sh
Press i to start editing, then enter the following content:
#!/bin/sh

# Define the root directory path of the Debian chroot system
DEBIANPATH="/data/local/tmp/Debianchroot"

# Fix setuid permissions on /data directory to ensure root access works
busybox mount -o remount,dev,suid /data

# Bind essential Android system directories into the chroot environment
busybox mount --bind /dev $DEBIANPATH/dev
busybox mount --bind /sys $DEBIANPATH/sys
busybox mount --bind /proc $DEBIANPATH/proc
busybox mount -t devpts devpts $DEBIANPATH/dev/pts

# Prepare /dev/shm for apps requiring shared memory (e.g., Electron apps)
mkdir $DEBIANPATH/dev/shm
busybox mount -t tmpfs -o size=256M tmpfs $DEBIANPATH/dev/shm

# Bind internal storage (sdcard) into chroot for Debian system access
mkdir $DEBIANPATH/sdcard
busybox mount --bind /sdcard $DEBIANPATH/sdcard

# Enter Debian chroot environment as root
busybox chroot $DEBIANPATH /bin/su - root
Save and exit by pressing ESC, typing :wq!, and hitting Enter.
Next, make the script executable and run it:
chmod +x debian.sh
sh debian.sh
Step 5: Configure Network Inside Debian chroot
Once inside the Debian chroot environment, the next step is to configure networking and update the system for stable operation.
Fix DNS and hosts to avoid failures when running APT:
echo "nameserver 8.8.8.8" > /etc/resolv.conf
echo "127.0.0.1 localhost" > /etc/hosts
Configure network permissions to avoid warnings:
groupadd -g 3003 aid_inet
groupadd -g 3004 aid_net_raw
groupadd -g 1003 aid_graphics
usermod -g 3003 -G 3003,3004 -a _apt
usermod -G 3003 -a root
Step 6: Update System and Install Supporting Packages
Run the following command to update:
apt update && apt upgrade -yInstall essential software:
apt install curl git nano net-tools sudo vim wgetSet the timezone:
ln -sf /usr/share/zoneinfo/Asia/Jakarta /etc/localtimeStep 7: Add a Regular User
Create a regular user:
groupadd storage
groupadd wheel
useradd -m -g users -G wheel,audio,video,storage,aid_inet -s /bin/bash teknotutorial
passwd teknotutorial
Grant sudo access:
nano /etc/sudoersAdd the following line under User privilege specification:
teknotutorial ALL=(ALL:ALL) ALL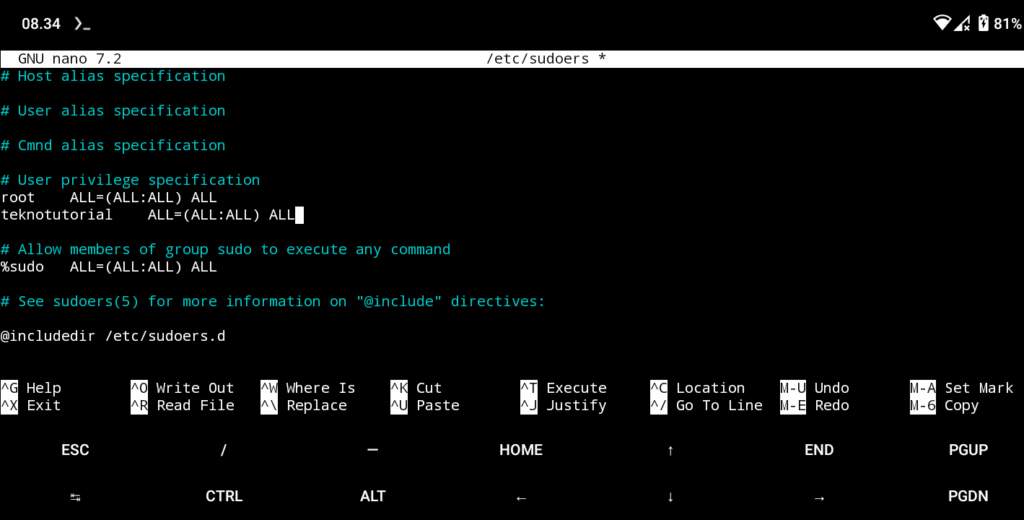
After editing, press Ctrl + X, then Y, and Enter to save.
Also, set a password for root:
passwd rootStep 8: Install XFCE Desktop Environment and Browser
Switch to the regular user:
su teknotutorial
cd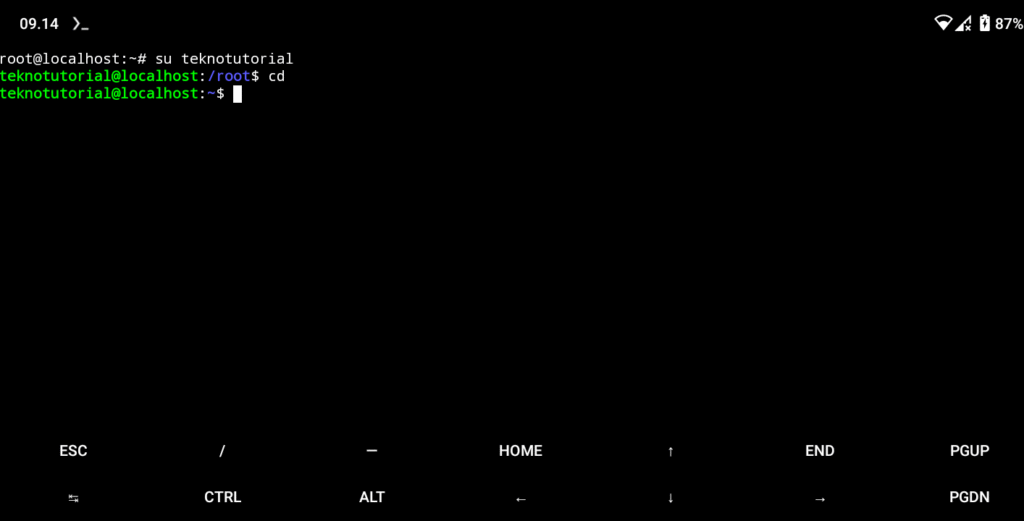
Install locale and set locale:
sudo apt install locales
sudo locale-gen en_US.UTF-8
Install the XFCE desktop environment:
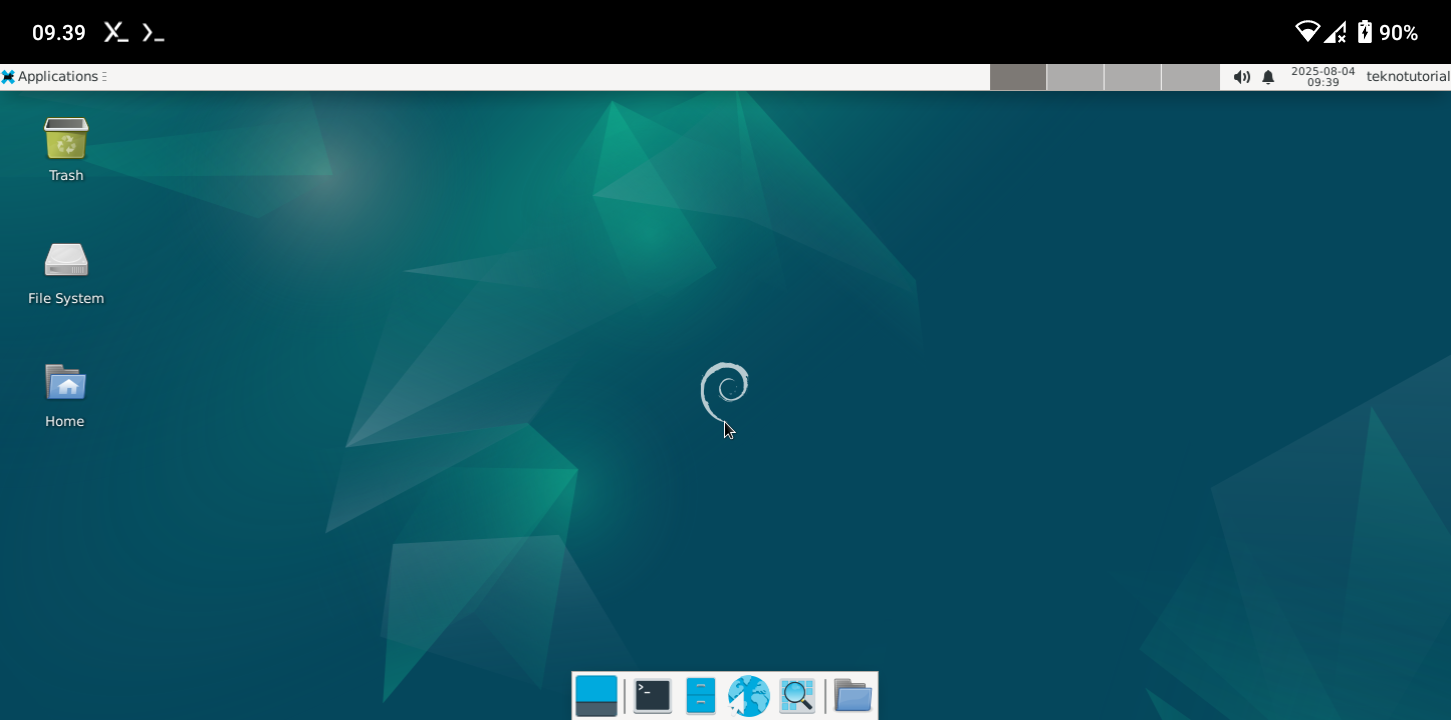
sudo apt install dbus-x11 xfce4Install the Chromium browser:
sudo apt install chromiumAfter installation finishes, exit the chroot environment:
exit
exit
Step 9: Edit Script to Start Debian chroot
Edit the debian.sh script:
vi /data/local/tmp/debian.shChange the line busybox chroot $DEBIANPATH /bin/su - root to:
busybox chroot $DEBIANPATH /bin/su - teknotutorial -c 'export DISPLAY=:0 && export PULSE_SERVER=127.0.0.1 && dbus-launch --exit-with-session startxfce4'Exit the root session in Termux:
exitStep 10: Configure Shortcut Widget
Go to your home directory and create a shortcuts folder:
mkdir .shortcuts
vim .shortcuts/Debian.sh
Enter the following script:
#!/bin/bash

# Kill all old processes that may conflict
killall -9 termux-x11 Xwayland pulseaudio virgl_test_server_android termux-wake-lock

# Launch Termux X11 app
am start --user 0 -n com.termux.x11/com.termux.x11.MainActivity

# Bind temporary directory for Debian chroot access
su -c "busybox mount --bind $PREFIX/tmp /data/local/tmp/Debianchroot/tmp"

# Run Termux X11 with display :0 asynchronously
XDG_RUNTIME_DIR=${TMPDIR} termux-x11 :0 -ac &

# Wait a few seconds for X11 server to start
sleep 3

# Start PulseAudio for sound support with no authentication from localhost
pulseaudio --start --load="module-native-protocol-tcp auth-ip-acl=127.0.0.1 auth-anonymous=1" --exit-idle-time=-1
pacmd load-module module-native-protocol-tcp auth-ip-acl=127.0.0.1 auth-anonymous=1

# Run VirGL server for 3D graphics acceleration in Android environment
virgl_test_server_android &

# Set permissions on tmp directory for multi-process access
su -c "chmod -R 1777 /data/data/com.termux/files/usr/tmp"

# Run the chroot script to enter Debian environment
su -c "sh /data/local/tmp/debian.sh"
Save and make the script executable:
chmod +x .shortcuts/Debian.shExit Termux, then go to your Android home screen. Before continuing, make sure Termux is allowed to display over other apps. Then, long-press an empty area on the home screen until the widget menu appears. Select Termux Widget from the widget list, then choose the script named Debian.sh to create an automatic shortcut to launch the Debian chroot environment.
Final Step: Uninstall Debian chroot
After completing the installation of Debian chroot on Android using Termux, you’ve unlocked new potential to use your phone like a portable Linux system. This approach allows deeper exploration of the GNU/Linux environment, perfect for users wanting to learn, develop software, or do technical work on the go. This tutorial aims to provide a comprehensive understanding, especially for those interested in turning Android into a Linux-based productivity platform.
If later you want to uninstall Debian chroot from your Android system, the process is simple. First, make sure you’ve exited the chroot environment and rebooted the device, then run the following commands:
su
rm -r /data/local/tmp/Debianchroot
rm -f /data/local/tmp/debian.sh
rm -f .shortcuts/Debian.sh
These commands will remove the Debian system directory used for chroot and the shortcut script from the Termux Widget, returning the system to its original state without traces of the chroot installation.
If you have any questions, encounter technical issues, or want to share your experience using this method, please leave a comment below the article. You can also contact us via the provided contact page. Every feedback is valuable for continuously improving and enriching the content presented.
