Cloudflare is a highly popular Content Delivery Network (CDN) service used by millions of users worldwide, from web developers and personal blog owners to large-scale enterprises. It’s well-known for its ability to speed up website content delivery through a global server network while also providing protection against various cyber threats. With features like caching, traffic optimization, and basic security, Cloudflare helps make websites faster to access and more resilient against both performance and security disruptions.
When it comes to domain management, Cloudflare acts as an intermediary between your website visitors and your web server. All access requests are first routed through Cloudflare’s global network before reaching your server. This provides two direct benefits: faster load speeds and protection from various cyber threats. The best part? This process can be done for free and implemented quickly in just a few simple steps.
This article will walk you through how to connect your domain to Cloudflare for free and fast. You don’t need to understand complicated networking concepts. Even if you’ve just purchased a domain, the steps are straightforward. This guide is structured from start to finish so that by the end, your domain will be fully active and managed through the Cloudflare dashboard.
Starting the Domain Setup Process
The first step is to log in to your Cloudflare account. If you don’t have one yet, sign up on Cloudflare’s official website. Once you’re logged in, you’ll be taken to the main dashboard that displays the platform’s primary features.
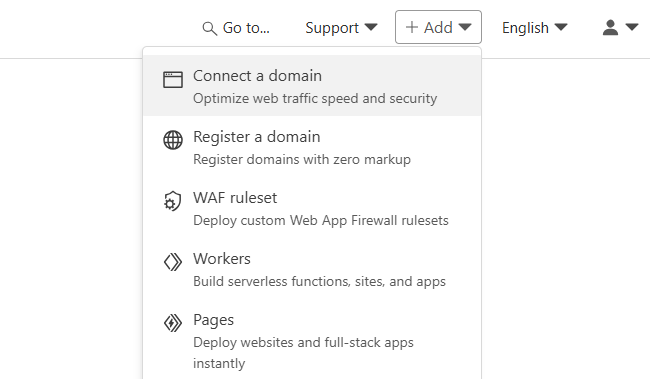
To add a domain, click Add and select Connect a domain. Then, enter the domain name you want to connect.
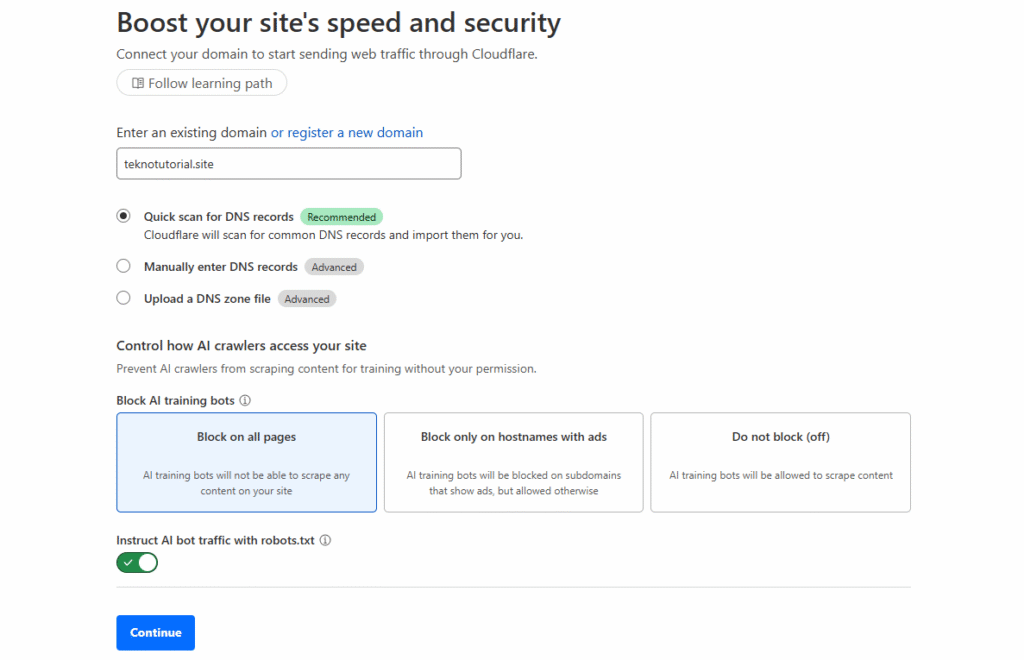
After entering your domain name, click Continue to proceed. Cloudflare will perform an initial scan of the domain and prepare the interface for further configuration.
Choosing a Cloudflare Plan
The next step is to choose a plan for your domain. Cloudflare offers several plan options, from free to premium. For most users, especially blog owners, personal websites, or small projects, the free plan is more than enough.

Choose the Free option to continue. Despite being free, this plan already includes many essential features like DNS management, automatic SSL certificates, basic DDoS protection, and access to Cloudflare’s detailed analytics dashboard. After selecting the plan, click to move on to the DNS setup stage.
Reviewing and Managing Domain DNS
Once you’ve selected your plan, Cloudflare will try to fetch any existing DNS records for your domain. If your domain has been active before and was configured to point to a specific server or hosting provider, Cloudflare will usually detect and import all necessary DNS records automatically.
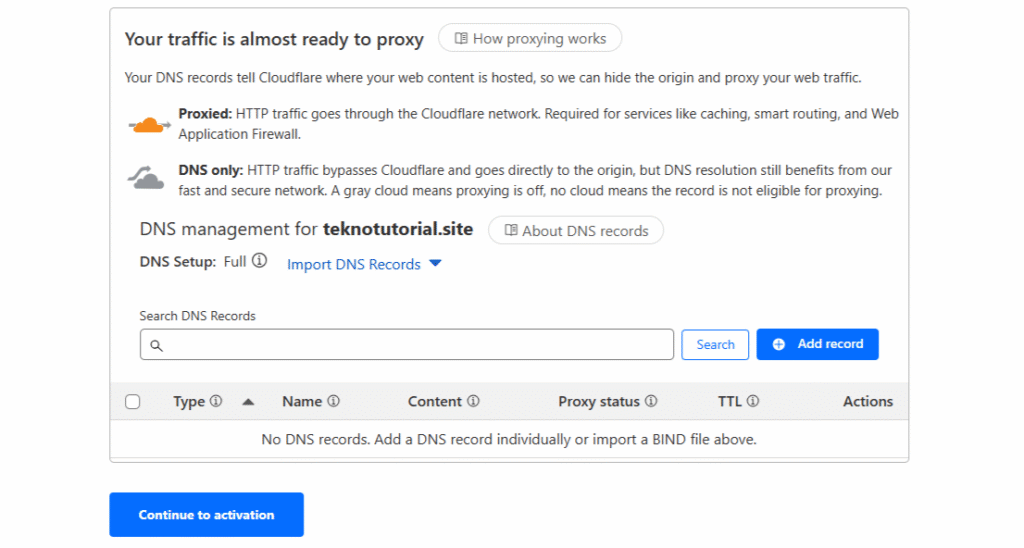
If you’ve just purchased the domain and haven’t set up any DNS records yet, this page may appear empty. You can still proceed and add records manually at any time from the Cloudflare dashboard. For domains with existing DNS configurations, the records will be automatically imported at this stage. If none are present, simply continue to the next step.
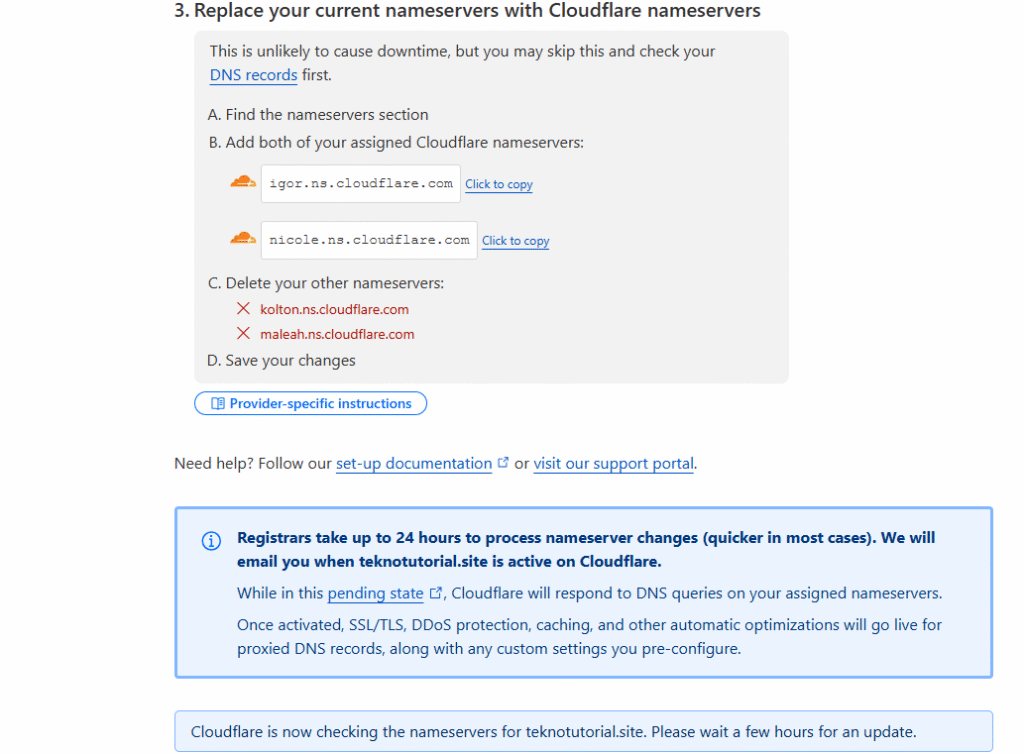
Changing Your Domain’s Nameservers
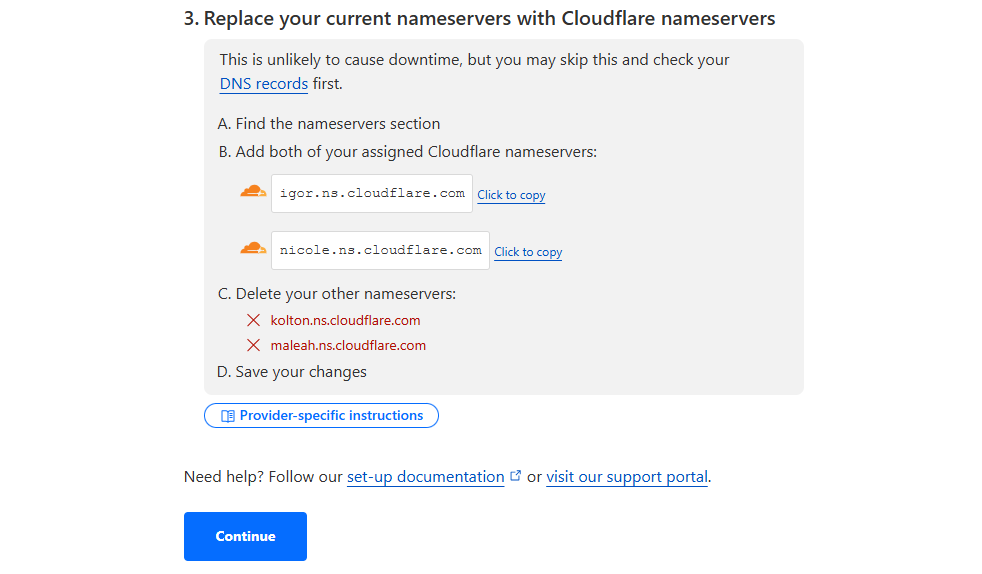
Once the DNS configuration is complete, Cloudflare will provide you with two nameservers for your domain. These nameservers are the key to directing your domain traffic entirely through Cloudflare’s system.
Next, log in to your domain registrar, which is the provider where you purchased your domain. Once logged in, locate the settings for managing your domain’s nameservers.
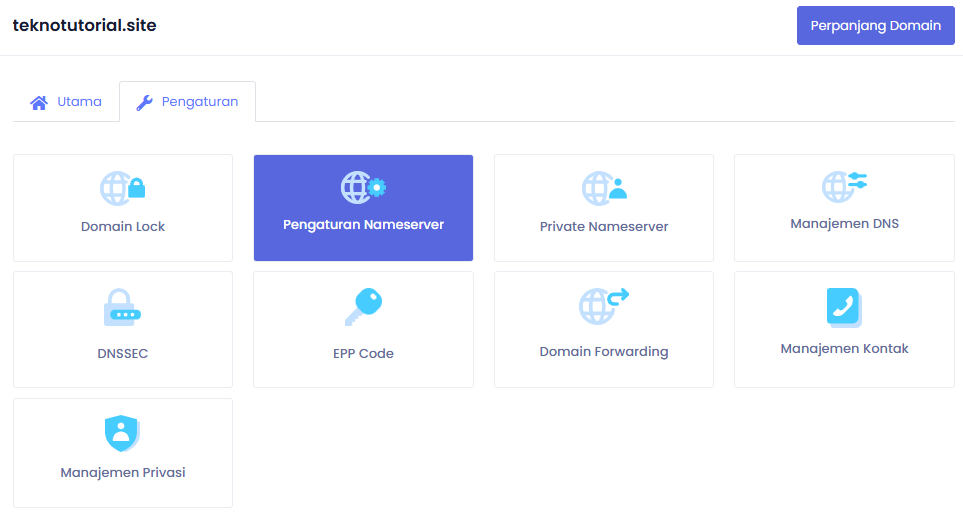
In the nameserver settings menu, remove your registrar’s default nameservers and replace them with the two nameservers provided by Cloudflare. Be sure to enter them correctly, without any extra spaces or incorrect characters.
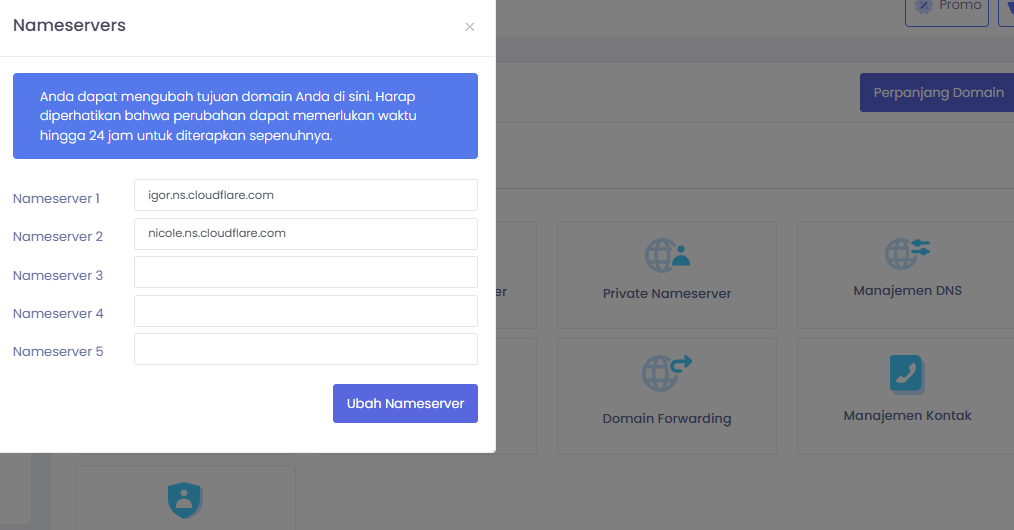
After entering Cloudflare’s nameservers, save the changes. This process usually takes only a short time, but depending on your registrar, propagation can take anywhere from a few minutes to 24 hours.
Verifying the Connection and Activating Your Domain
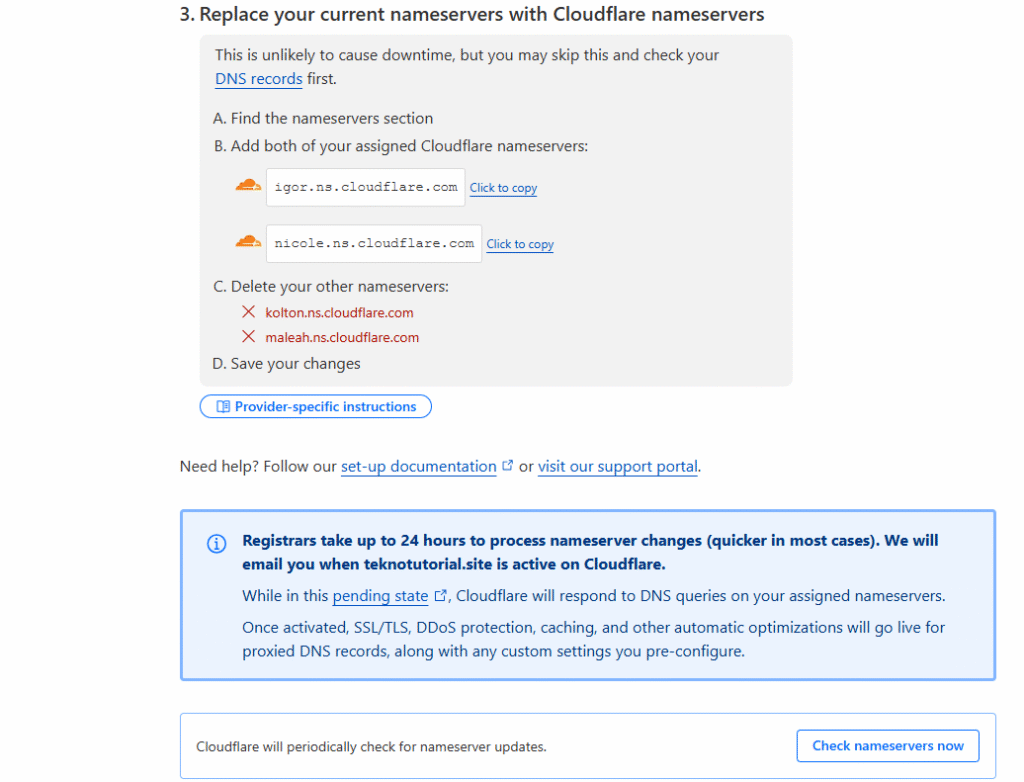
After you’ve updated your domain’s nameservers to Cloudflare, return to the Cloudflare dashboard and click Continue, then Check nameservers now. This will start Cloudflare’s verification process to confirm that your domain is correctly pointing to their nameservers.
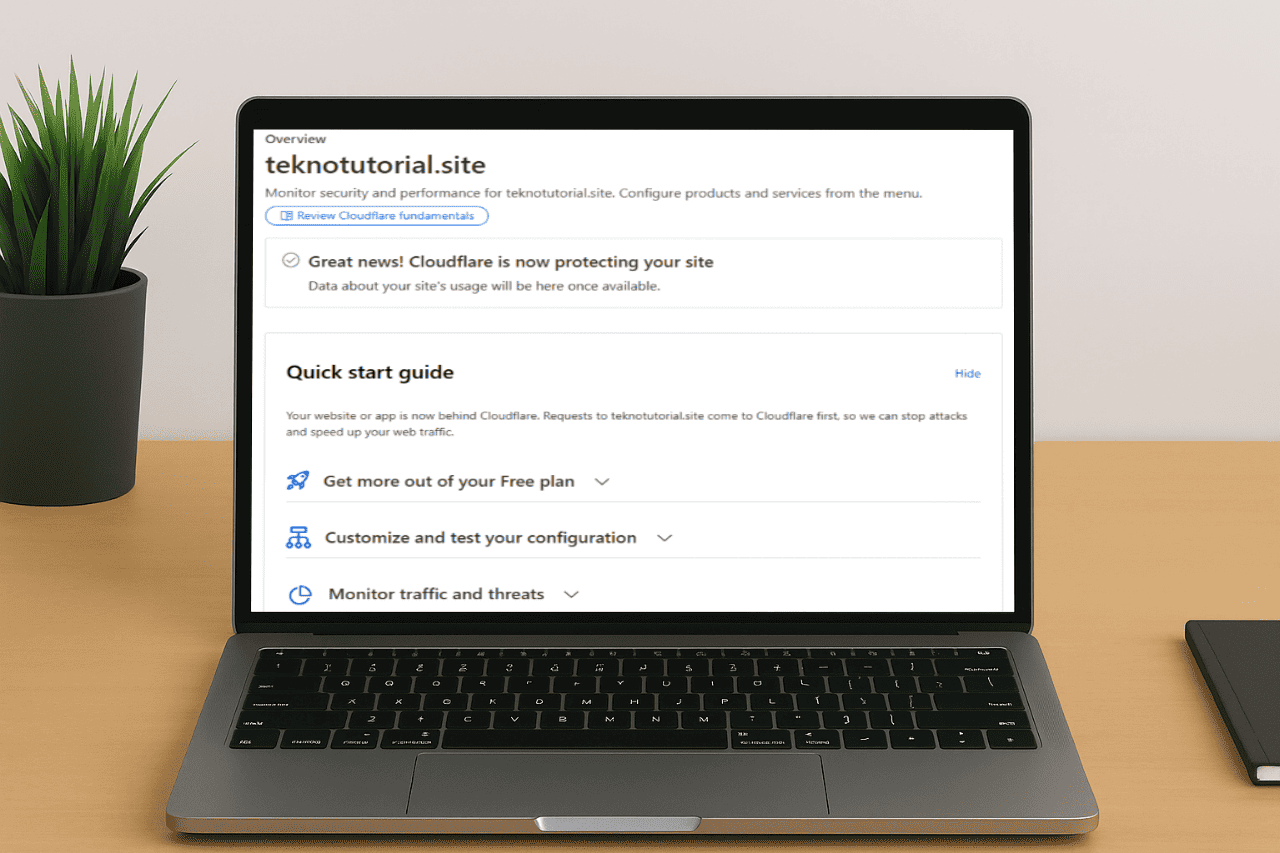
If everything is set up properly, Cloudflare will send you an email notification confirming your domain has been successfully configured. You’ll also see the domain’s status marked as Active in your Cloudflare dashboard.
Once verification is complete, your domain will be fully managed by Cloudflare. You can immediately make additional configurations such as adding an A record to point to your server’s IP, setting up redirects from non-www to www (or vice versa), enabling SSL, or configuring basic firewall rules to block harmful IP addresses. Cloudflare will also automatically start caching your site’s assets and protecting it from unwanted attacks. Even without advanced configurations, the default setup is already highly effective at reducing server load while adding an extra layer of security.
Benefits of Connecting Your Domain to Cloudflare
Once all the steps above are completed and your domain is active on Cloudflare, you’ll instantly enjoy several key benefits, including:
- Automatic Security Protection
Cloudflare safeguards your site from various cyber threats such as DDoS attacks, bot crawling, brute-force login attempts, and more. This protection works automatically in the background. - Real-Time DNS Management
You can update DNS records anytime, and changes are applied globally without the long propagation delays common with standard registrar panels. - Free SSL Certificate
Cloudflare provides free SSL for your domain without requiring manual installation on your server. Your site will be instantly accessible via HTTPS. - Global CDN Coverage
Your site will load faster from anywhere in the world because static files such as images, CSS, and JavaScript are served through Cloudflare’s worldwide network. - Analytics Dashboard and Extra Tools
Cloudflare offers a statistics panel that displays site traffic data, blocked threats, cache performance, and more. You can monitor your site’s performance in real-time. - Additional Security Options
Once active, you can enable advanced security features like geo-IP blocking, login protection, bot filtering, and custom firewall rules.
Conclusion
Connecting your domain to Cloudflare is a smart move for anyone who wants a fast, secure, and easy-to-manage website. The process doesn’t require advanced technical skills; just follow the step-by-step guide in this article. Even beginners can do it in no time. In today’s complex digital world with increasing security risks, having extra protection and a reliable DNS management system is a huge advantage. Cloudflare provides all these benefits for free and with minimal hassle.
This concludes the complete guide on How to Connect a Domain to Cloudflare for Free and Fast. Hopefully, this article helps you build a more reliable and professional website. If you plan to take the next steps, such as connecting to a VPS server, installing WordPress, or setting up domain email, you now have a solid foundation ready to go.

