
Cloudflare Tunnel is a feature provided by Cloudflare that allows localhost to be accessible to the public without having to open ports or configure NAT on a router. With this technology, the connection from the internet to the localhost no longer needs to take a direct route. It is instead redirected first through Cloudflare’s infrastructure, which encrypts and forwards the traffic to the local device. This solution is ideal for developers working with test servers in a local environment, collaborative teams needing shared access to internal applications, or anyone wanting to make local services available without directly exposing their public IP address.
The main advantage of Cloudflare Tunnel lies in its combination of ease of use and strong security. The connection process is one-way, outbound from the device to Cloudflare’s network, meaning there are no inbound connections directly entering the local network. All incoming traffic is first routed to Cloudflare’s network, then securely forwarded to the localhost. This adds an extra layer of protection against direct attacks and enables safer, centralized connection management. This article will fully explain how to create a tunnel using the Cloudflare Zero Trust interface and how to apply it to connect local services such as WordPress so they can be accessed publicly over the internet.
Most of the steps in this guide are performed through Cloudflare’s web interface, making them easy to follow without heavy terminal use. Only in the initial phase, such as when installing support tools, will you need to run a few terminal commands. Overall, the process is beginner- and intermediate-friendly. Before starting, make sure you have a Cloudflare account and are logged in to the Cloudflare Zero Trust dashboard. Here’s the complete process:
1. Open the Tunnel Menu in the Cloudflare Zero Trust Dashboard
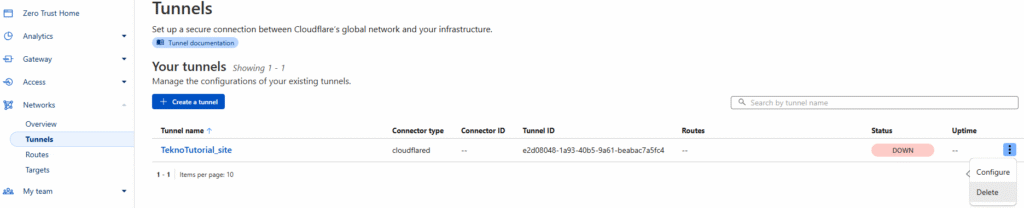
Once you’ve logged into your Cloudflare account via the Cloudflare Zero Trust dashboard, open the Networks > Tunnels menu. This page is the control center for all the tunnels you have.
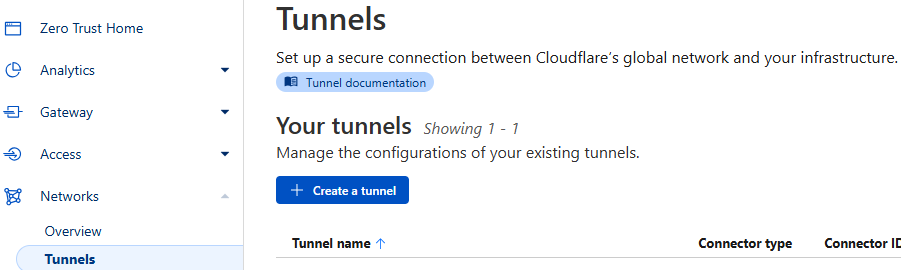
On this page, you’ll see a list of tunnels you’ve created. If you’re a new user who hasn’t created a tunnel before, you’ll see an Add a tunnel button. To create a new tunnel, click Create a tunnel and proceed to the next step.
2. Choose the Tunnel Type
After selecting to create a tunnel, you’ll be asked to choose the connection method. Cloudflare offers Cloudflared and WARP Connector, but the most common and flexible option is Cloudflared.
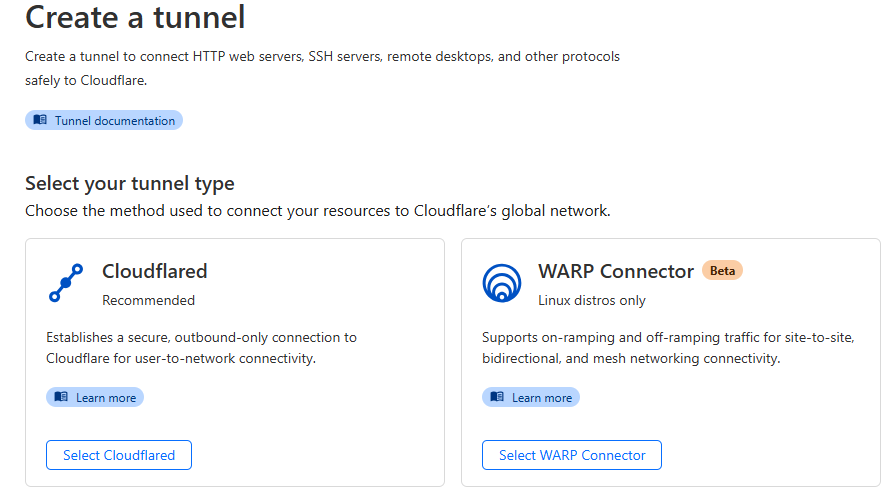
Click Select Cloudflared to continue. This allows the connector to run directly on your device without special hardware or third-party services. This option is ideal for Linux, Windows, or even virtualized systems like WSL.
3. Create a Tunnel Name
Next, you’ll need to name your tunnel. You can choose any name you want. This name is not visible to the public but is used for identification in the Cloudflare Tunnel dashboard.
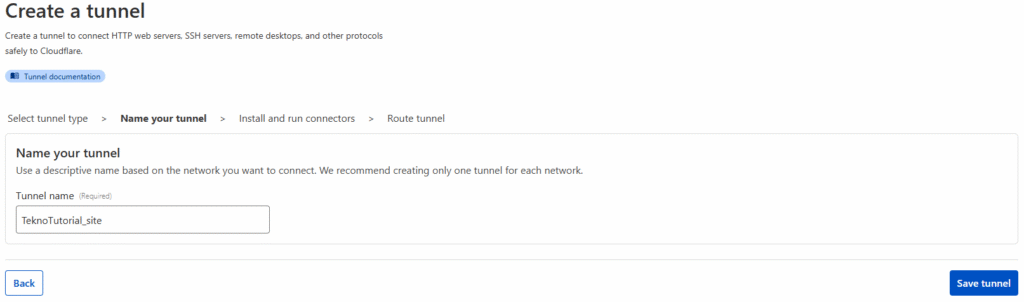
After entering the name, click Save tunnel to proceed to the connector installation step.
4. Install and Run the Cloudflared Connector
After successfully naming your tunnel, you’ll be taken to a page where you select your operating system environment. Cloudflare provides specific commands based on your operating system, whether Linux, Windows, or macOS.
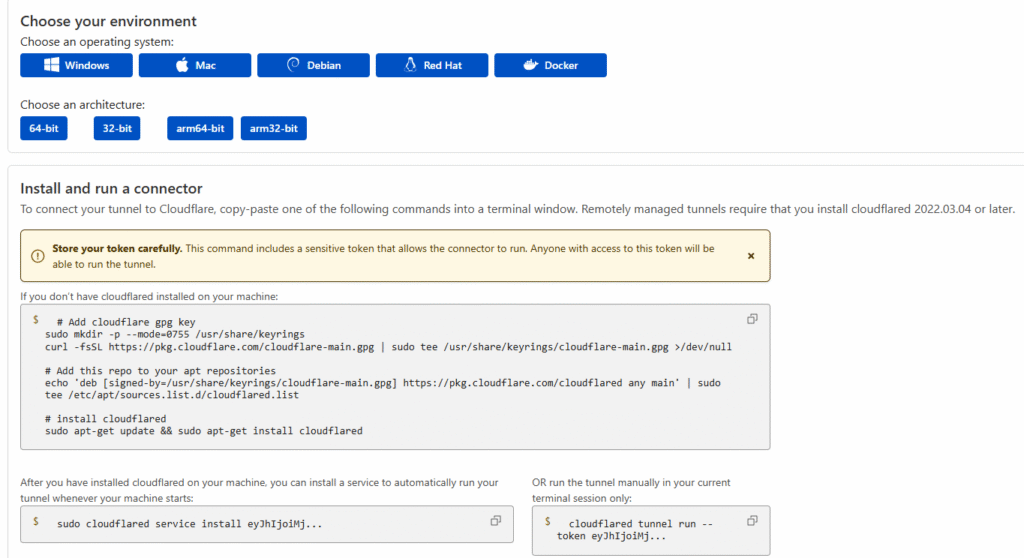
For example, the guide may show commands for a Debian-based 64-bit architecture. After running the cloudflared installation command in your terminal, the system will download and activate the connector.
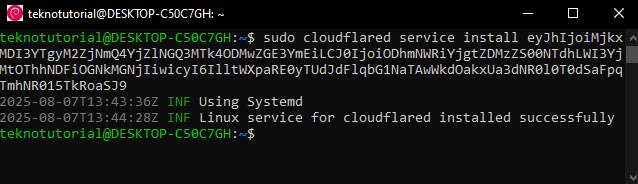
Once the connector is running, the tunnel configuration page will confirm that the connector is active.
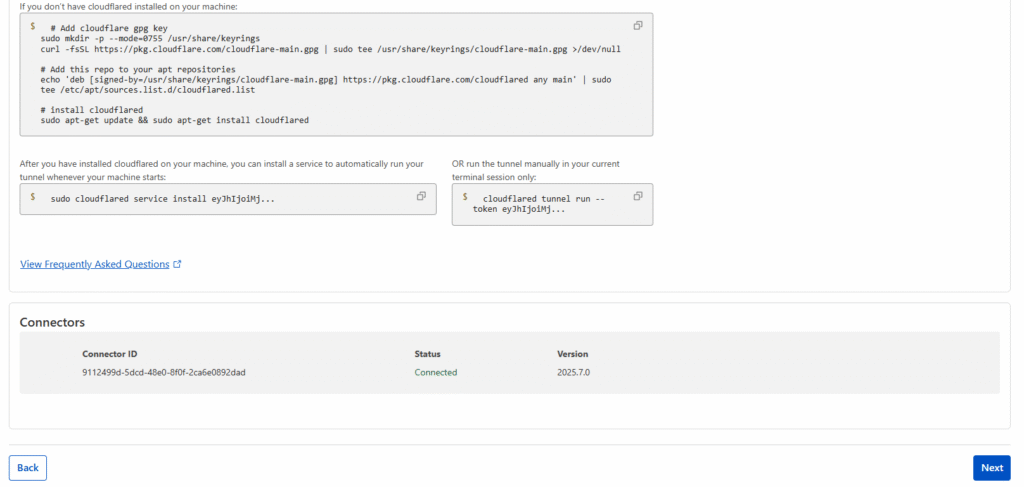
Click Next to proceed to the Public Hostname configuration step, which will define the public address for your localhost.
5. Add a Public Hostname
The final step in creating a tunnel is setting a public hostname, which is the domain name that will be used to access your localhost publicly. This hostname serves as an entry point, allowing localhost to be accessed from the internet, which would otherwise be blocked by NAT or firewall restrictions.
On the hostname configuration page, you can select a subdomain to point to your localhost. You’ll also need to specify the service type (such as HTTP or HTTPS) and the local port where your server is running. For example, if you’re running a web server on localhost port 80, simply point the domain to that address.
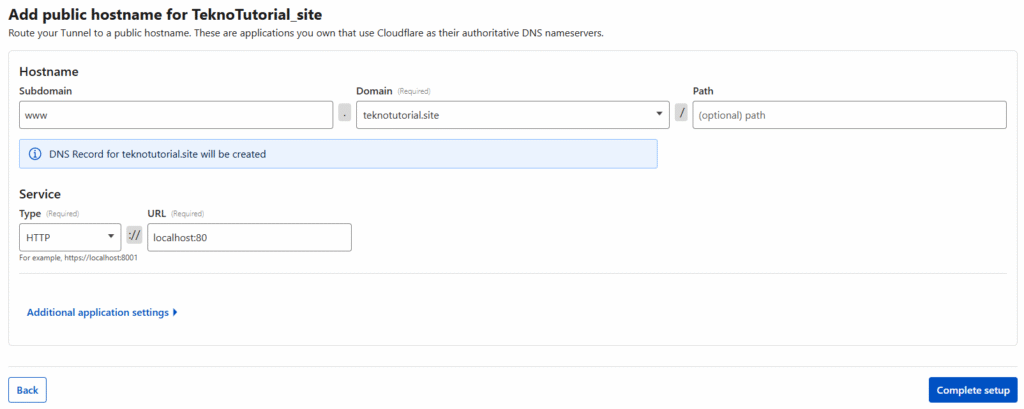
After filling in all the information correctly, click Complete setup. Within seconds, the domain you selected will be active and ready to access your localhost through Cloudflare’s network.
Pointing WordPress to the Cloudflare Domain
Once Cloudflare Tunnel is active and you’ve added a public hostname, the next step is to ensure your localhost can be accessed via that domain. A common example is WordPress installed on Debian using a LAMP Stack.
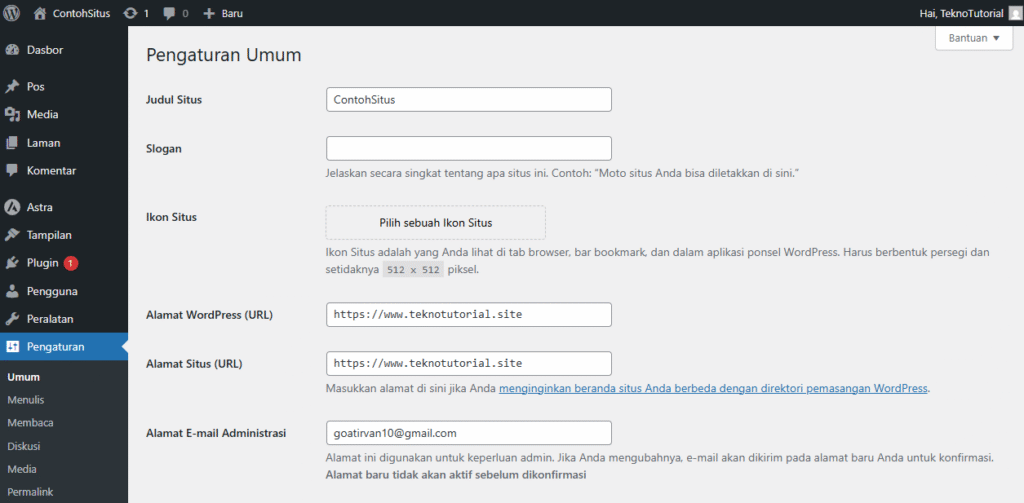
Log in to your WordPress dashboard, then navigate to Settings > General. Change the WordPress Address (URL) and Site Address (URL) fields to the domain configured in Cloudflare Tunnel, then click Save Changes.
After saving, open your Debian terminal and edit the wp-config.php file:
sudo nano /var/www/html/wordpress/wp-config.phpAdd the following line before the line /* That's all, stop editing! Happy publishing. */:
$_SERVER['HTTPS'] = 'on';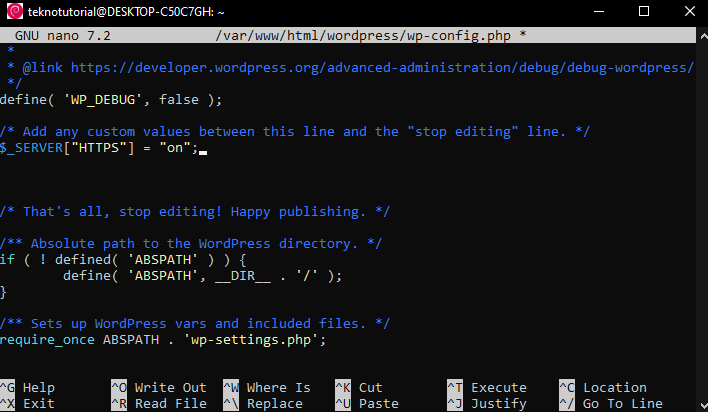
This step ensures WordPress recognizes the connection as HTTPS, even though SSL is handled by Cloudflare.
Restart Apache to apply the changes:
sudo systemctl restart apache2Now, your WordPress site, which was previously only accessible locally, can be reached publicly via the Cloudflare Tunnel domain.
Uninstalling the Tunnel If No Longer Needed
If, at any point, you want to stop using the tunnel or remove the cloudflared connector, the process is simple. First, remove the cloudflared service from your system:
sudo cloudflared service uninstallThis stops and removes the connector service.
Next, delete the tunnel from the Cloudflare dashboard. Go to Networks > Tunnels, click the three dots next to the tunnel name, and select Delete.
Once the tunnel is deleted, public access to your localhost will be automatically disabled. This is important if your server changes location, its role changes, or the related project becomes inactive.
Through Cloudflare Tunnel, you can access your localhost from anywhere without complex network configurations. This technology is extremely useful for application testing, remote collaboration, or real-time service presentations. Additionally, Cloudflare offers extra features like user authentication, access logging, and encryption to keep your connection secure.
By following this guide, you can quickly and securely make your localhost publicly accessible using your own domain, with Cloudflare Tunnel as the secure connection bridge.

